
We're rearranging out entire house. With two girls, the room that has been the babybedroom is getting too small[1], so we're taking it as an opportunity to make everything a little nicer before a much longer-goal plan of adding on to our already bizarrely added-to house--actually, here. Let me give you a totally dimensionally accurate floor plan:
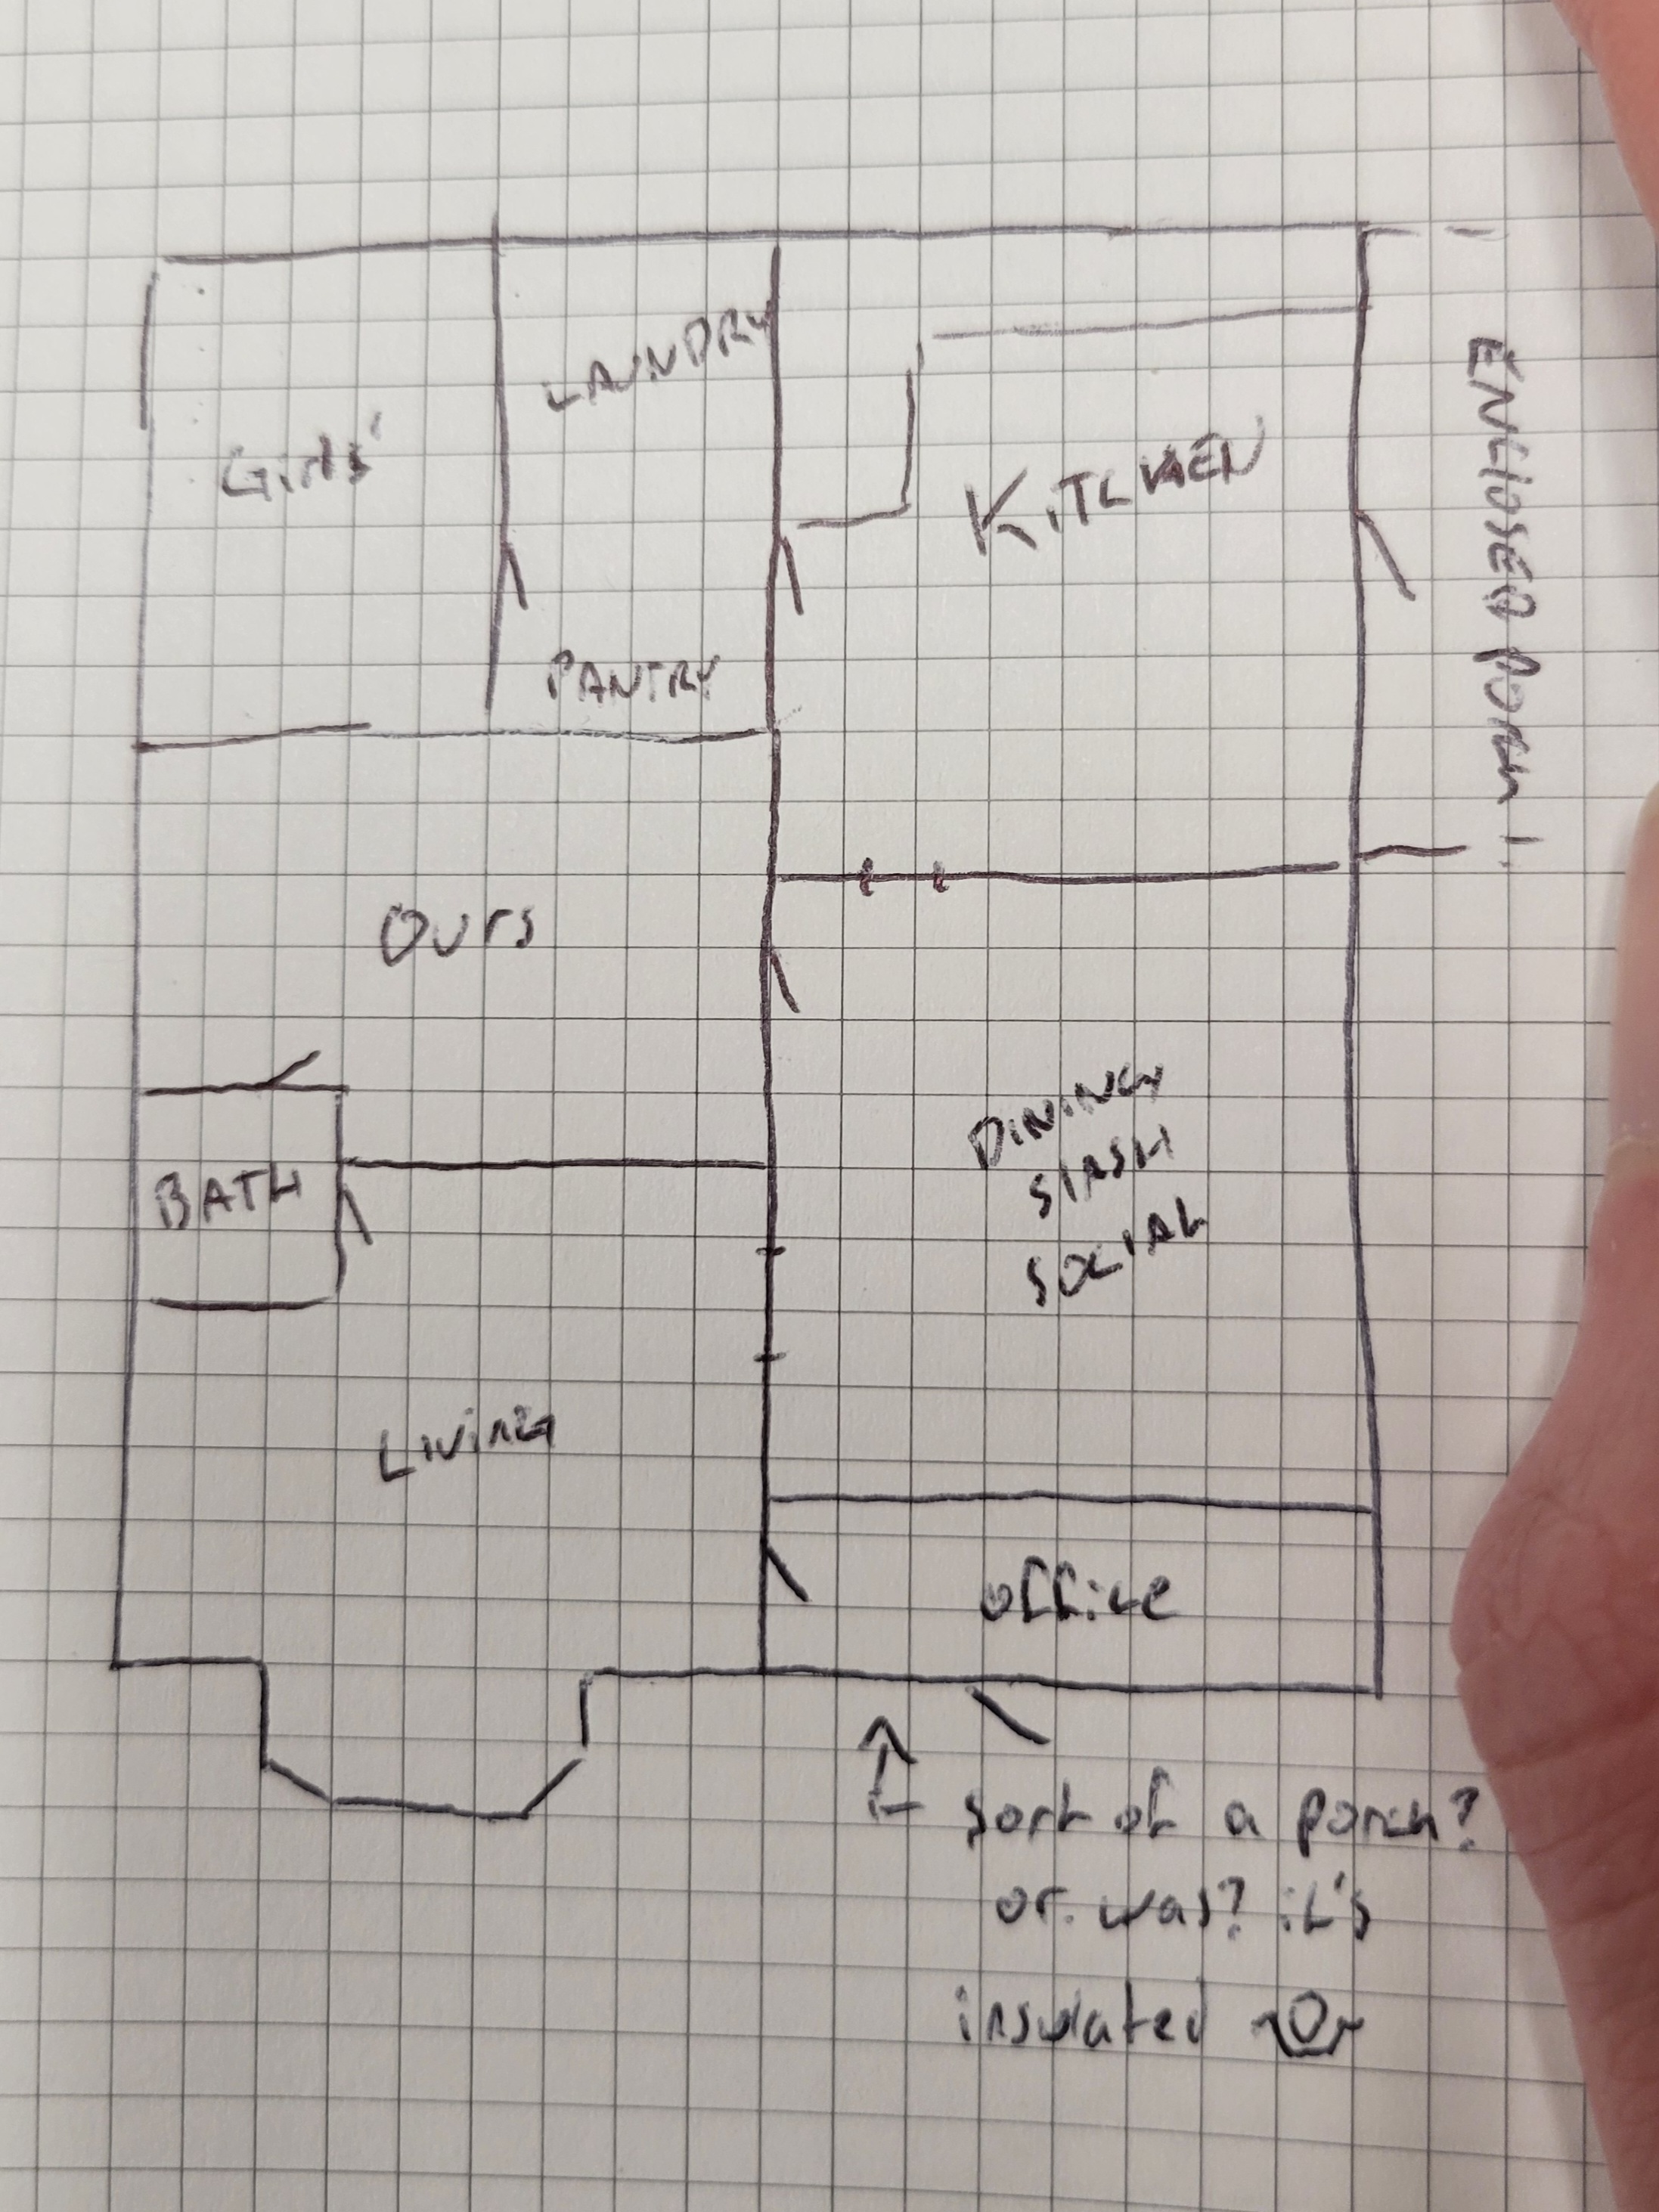
There is a window between our room and the girls'; it is super weird (and constantly curtained lol). As far as we can figure this house had the Girls'/laundry/most of the kitchen added on. The enclosed porch off the kitchen and the NotPorch my office is in definitely were added on--neither are on the foundation (and we know when the kitchenporch was put on). Newspaper clippings indicate it's likely this house was also translocated here at some point in its possibly-close-to-if-not-surpassed-100-year-life. Apparently two or three owners ago--I still cannot believe this but the sources can be trusted--someone lived upstairs as a separate apartment. I literally cannot draw what the attics look like without going going 3D or topographical. The roof/floor distance is not conducive to living up there. How did it work?? Regardless: there is a door on our North exterior wall, one floor up. There is no stairway to this door.
I digress. We're rotating everything around. Kitchen's doing doubleduty as dining. Dining's our living room. Our bedroom will be the girls', the old living room is now our room, and their room is going to be transformed into a bathroom with an actual bathtub. It's going to be nice! We're pretty happy with how we're able to use the space in our new bedroom, we're excited for the addition space we'll have in the girls' room, and the living and dining is working just fine.[2] As an exercise in reexamining how we live it's been quite interesting and valuable too. We're very happy with what we have and it's fun to make what we have work in different ways.
One funny thing--and this is what the post is actually about--about our new bedroom location is how the West wall used to have a free standing wood stove. This means a couple square feet is brick, and there is a brick section of a wall with chimney on the other side. The chimney is actually capped and nonfunctional, and we've talked about removing the brick on the floor at least (I am not at all excited about making and sealing the hole in the wall the full chimney removal needs), but for now the brick is there due to bandwith requirements[3]. This means the head half of our bed is roughly one brick taller than the foot half. The quick solution was to just grab some bricks[4] and put the foot-end legs on those but. Our bed frame has wheels. And even locked they were happy to slide on the surface of the bricks.
I got tired of lifting each corner back on the bricks any time any of us nudged it, so I did this:
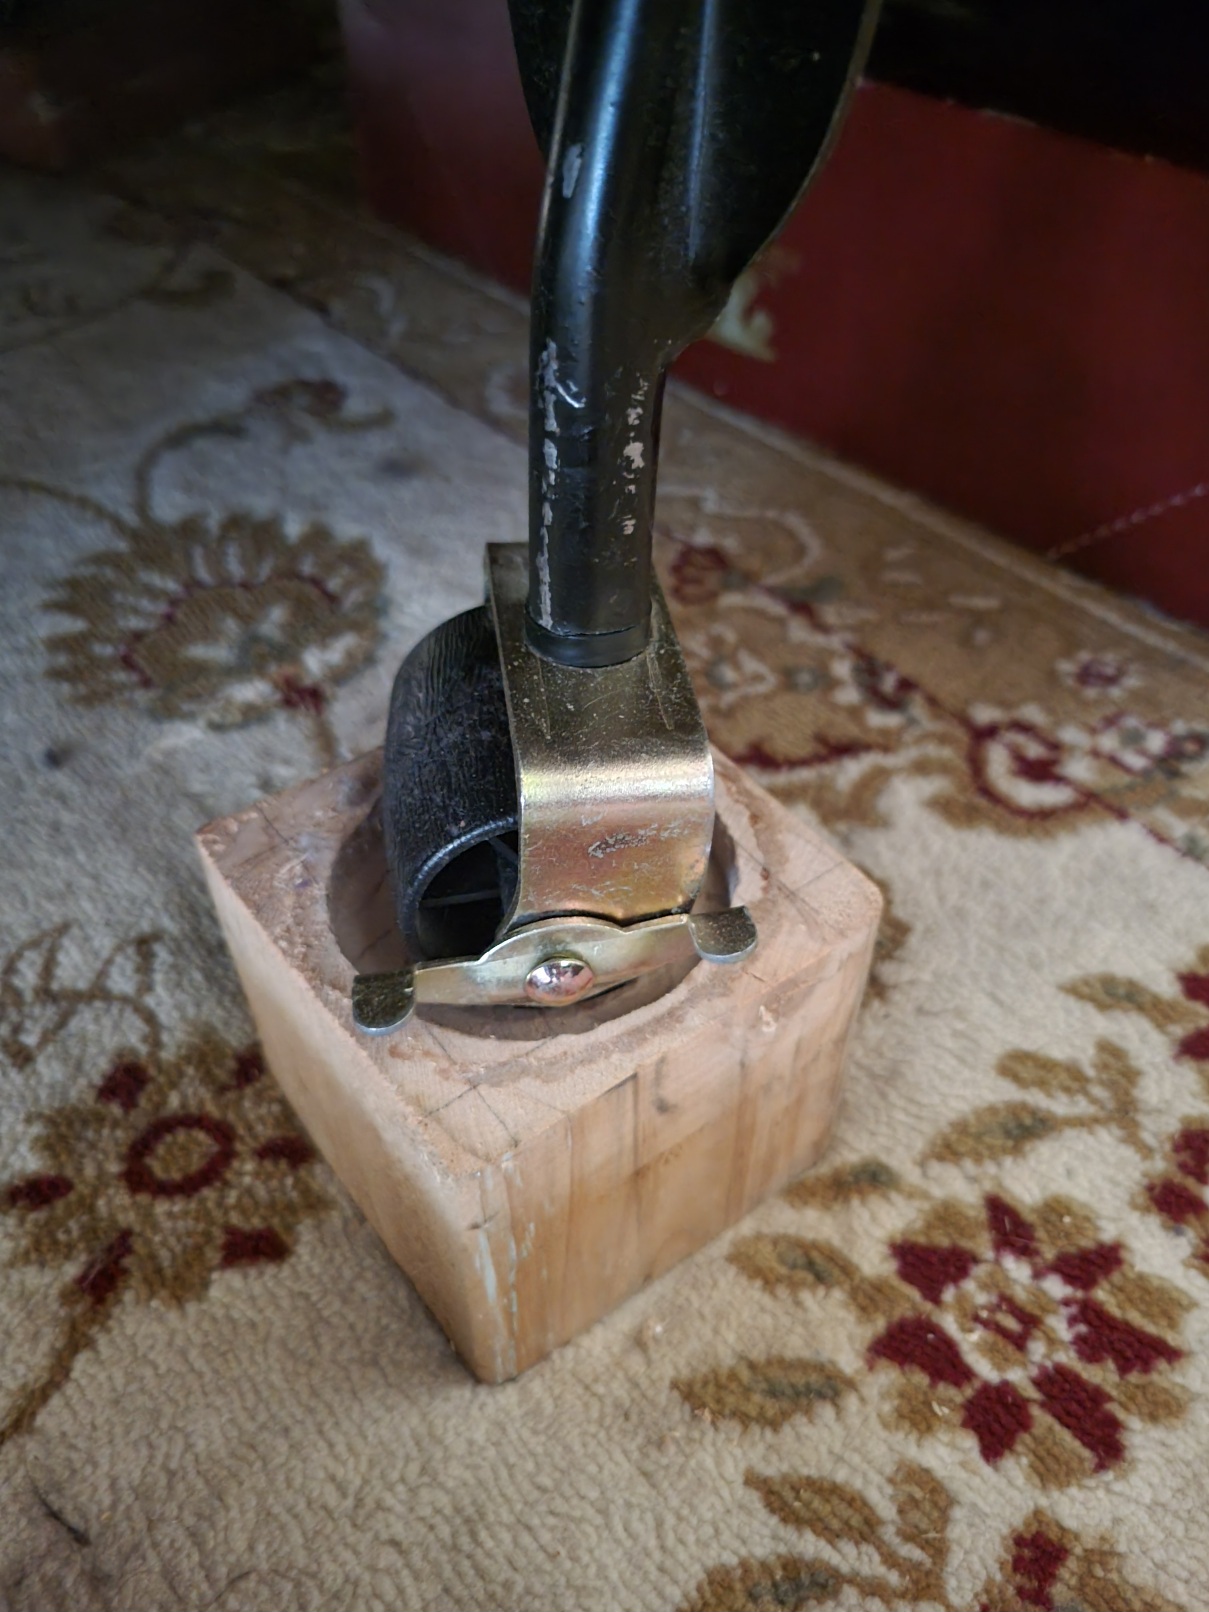
That's just a chunk of 4x4 with a neat little circle routed into one end. Cheap, didn't take long, and very satisfying to do--I love operating a router but don't often get a chance to do so! For this one, I used a guide I made out of the highly compressed 1/4" mdf that came as package support in the flatpack wardrobe we set up in our new bedroom. A 3" hole saw made a quick shape to route, and the guide/bit offset meant the end shape was like 2 3/4" or something. This was extremely vibes only given its purpose. I didn't even bother carefully aligning the guide before supergluing it down on each chunk of 4x4:
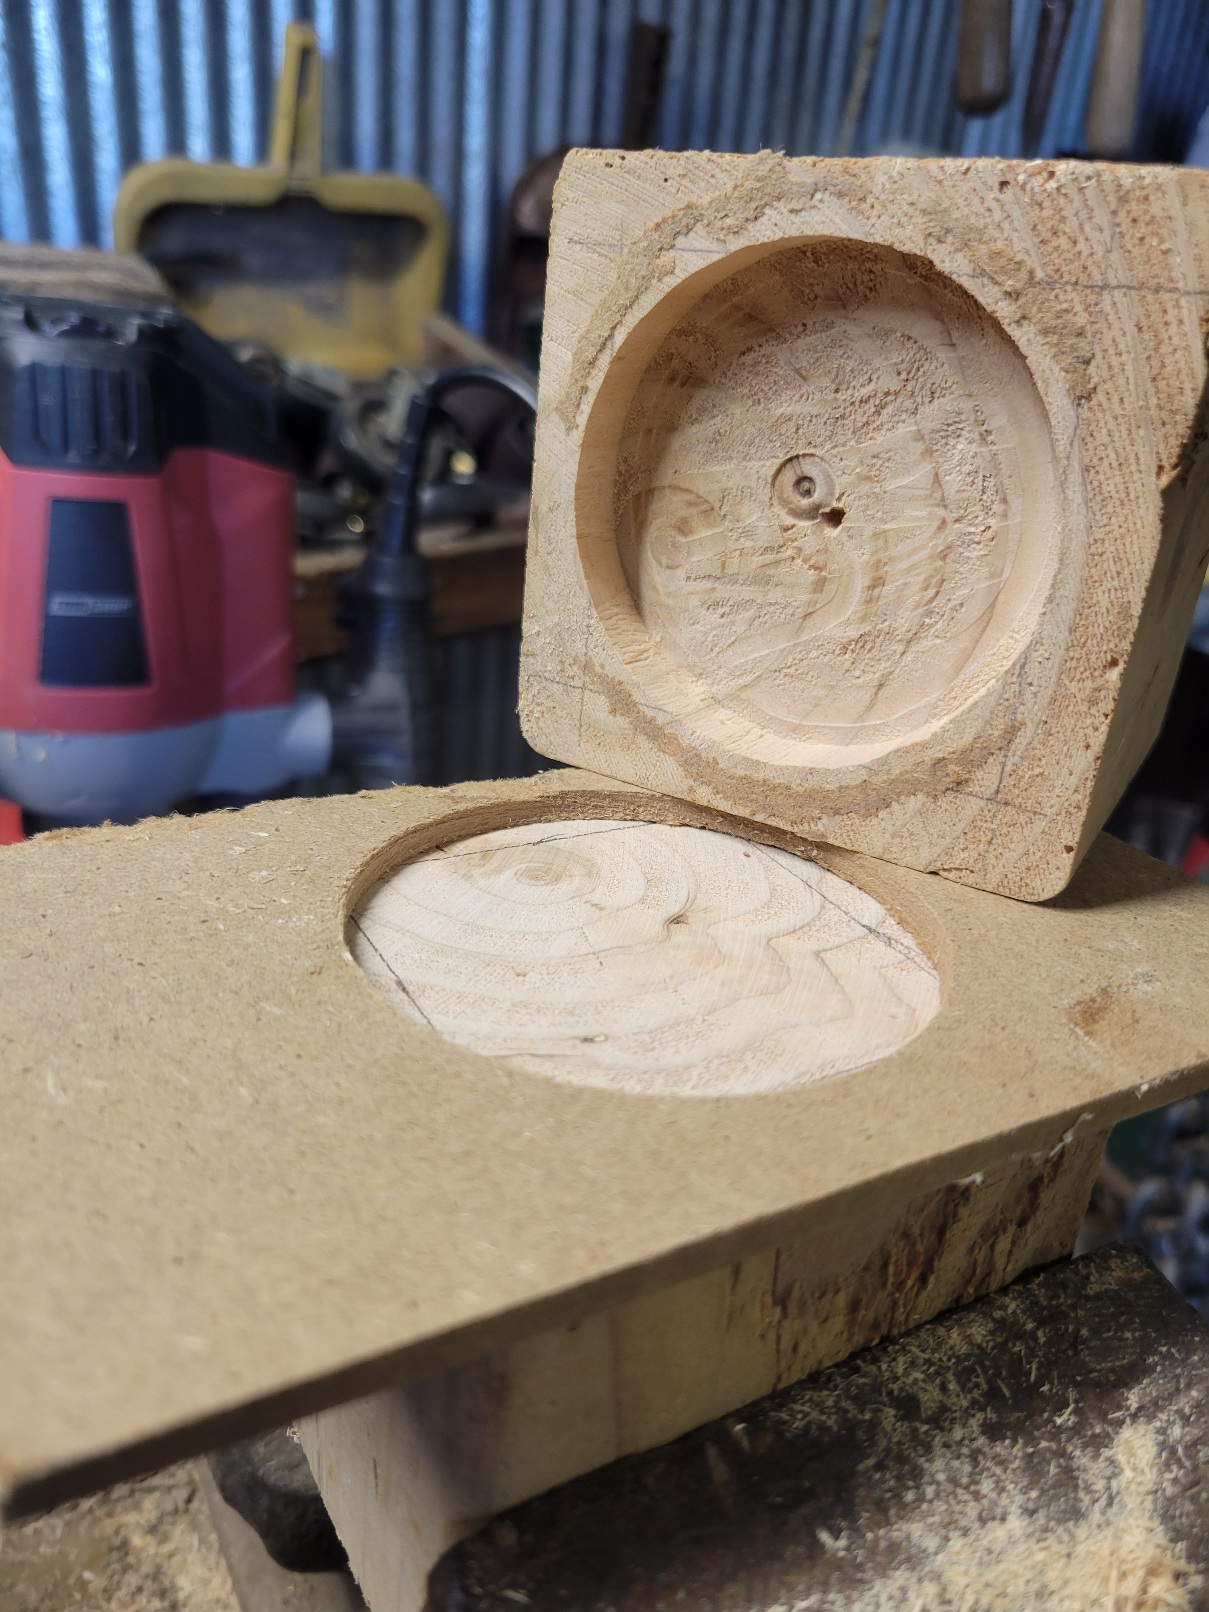
It worked quite nicely. I did end up having to drill an entry hole for the bit--I swear I have a 1/2" or 3/8" spiral upcut routing bit somewhere but I could not find it for the life of me. If I find some more excuses to do this again, I'll go and pick up another--if past me did buy one, that's a surefire way to get it to show up.
And find excuses to do it again I shall... routing is fun!
especially in terms of space to play! ↩︎
we do miss having our island counter opposite the sink, but it's a sacrifice we needed to make ↩︎
rearranging everything and planning a bathroom and painting rooms takes a big enough chunk as it is! ↩︎
We have a pretty large collection of them, all grabbed from piles of where they get dumped when the farmer plows the field next door. These are all just like the ones we have in our chimney. I think they're from a barn that burned down? I would assume that means the barn and this chimney were built around the same time 🤷 ↩︎