
The thing that kicked off my trying gunpla building was getting a little gundam guy from a gacha machine when I was visiting my SIL. There was a Japanese import shop at a mall that had all kinds of things but also a number of gacha machines. When I was a kid, my dad went to Japan and brought back all kinds of goodies, most of which were from the wonders of the 100 yen store or gacha machines; several of these Objects were little SD gundams with like, three points of articulation. They were cute and fun and I regularly think of the quebley one[1] cuz it was Such a Shape, so when there were little gacha gundams at this mall I picked one up and it spiraled into me occasionally dropping the dollars on a full set of them[2] and building uh. .. full size? gunpla[3].
The big ones are fun what with their complexity and color separated overlapping pieces and articulation and all, but really my heart is most in favor of the weird little semi-SD proportions of the Mobile Suit Ensemble guys and their universal/modular joint system. The other day I saw something that asked "why not both?" and now I have this little guy, who was built like a much bigger guy:
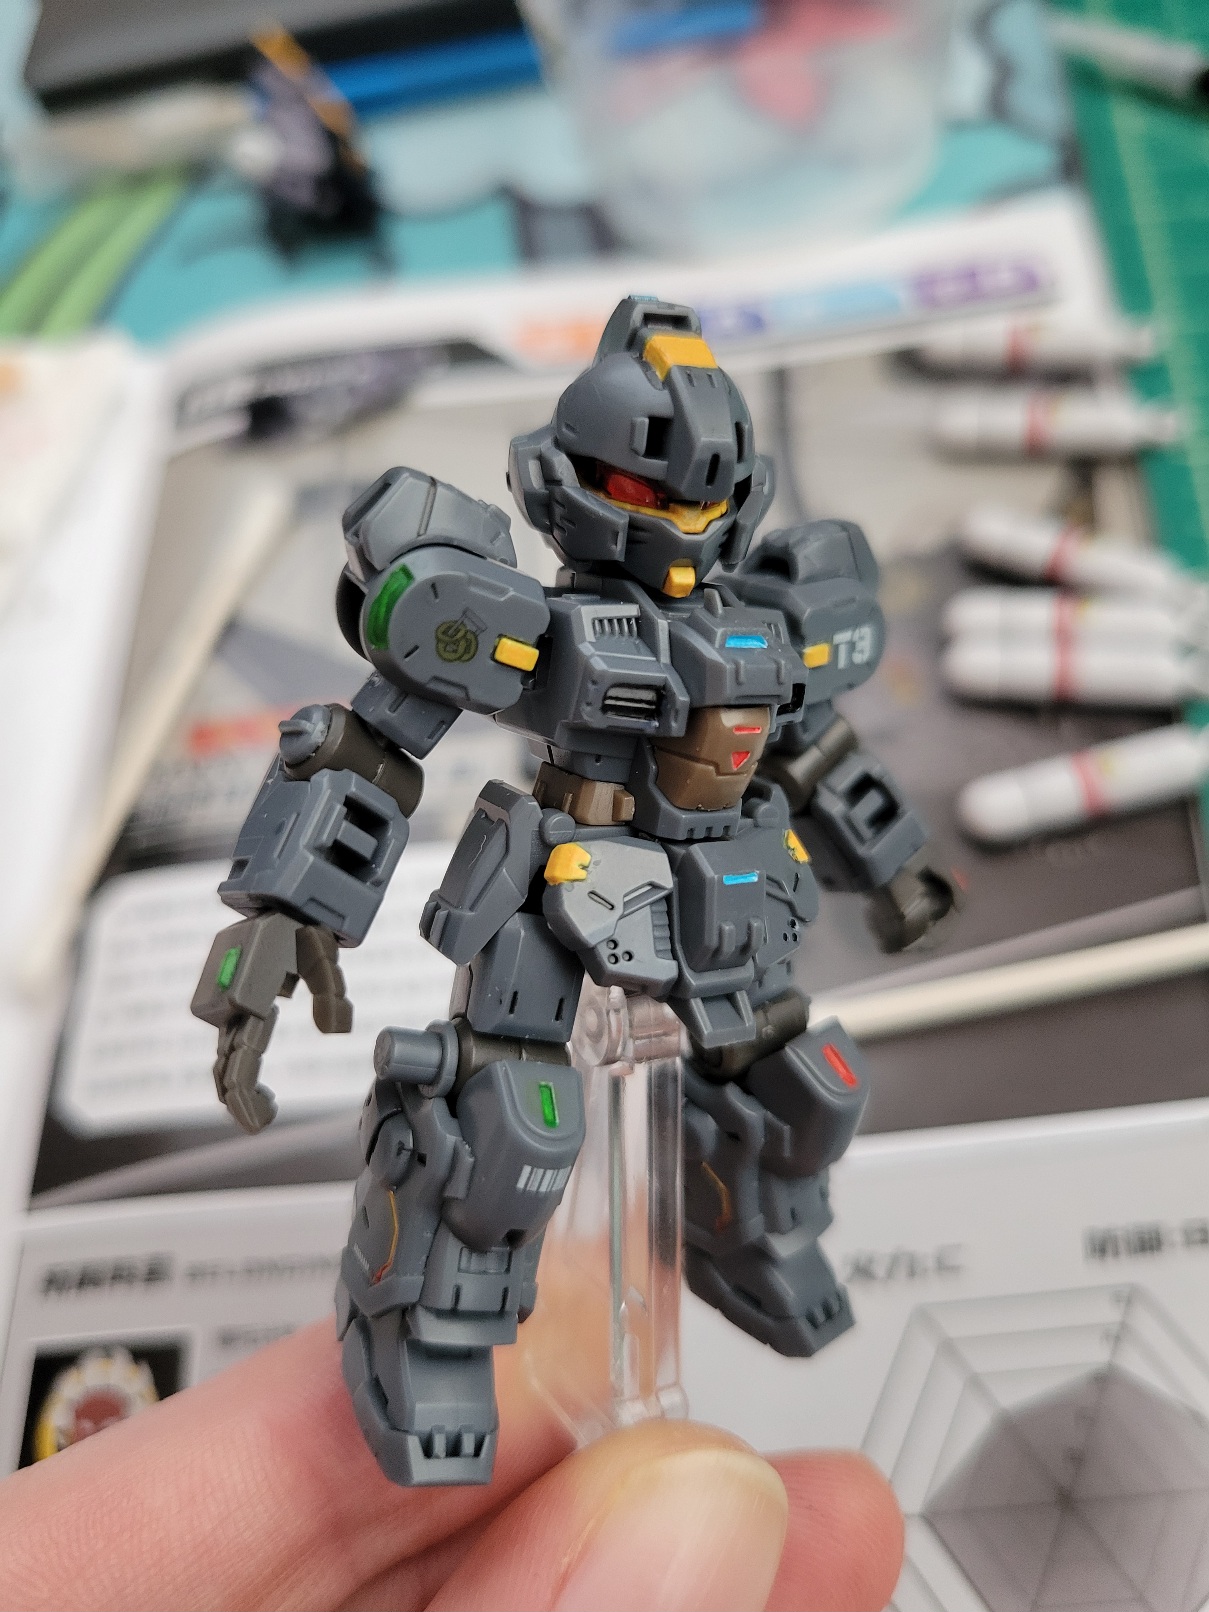
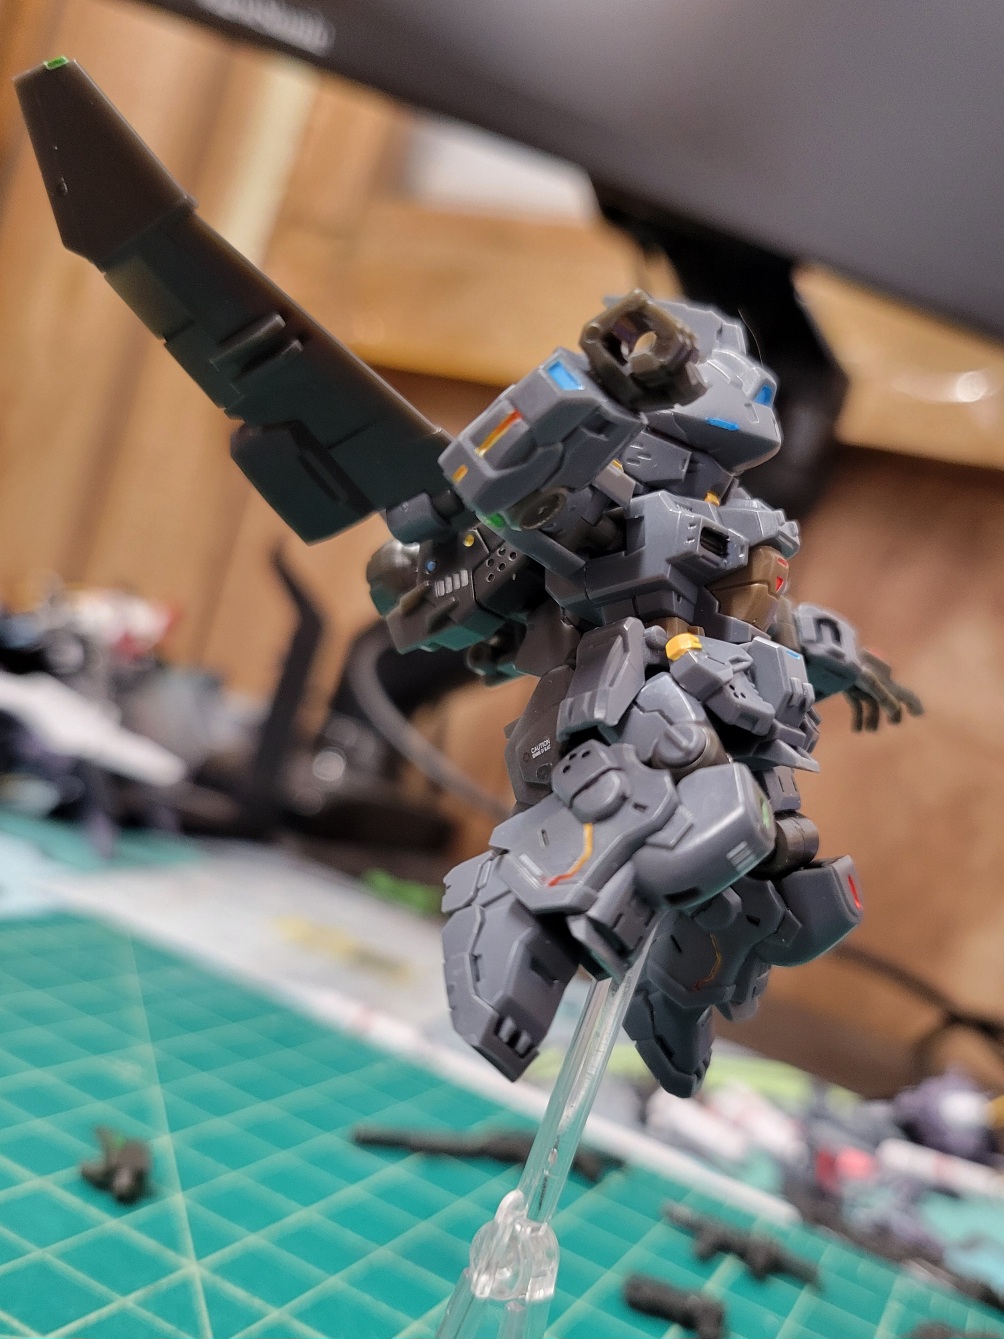
This guy. This guy is neat. He's the same exact size as a MSE gacha figure.
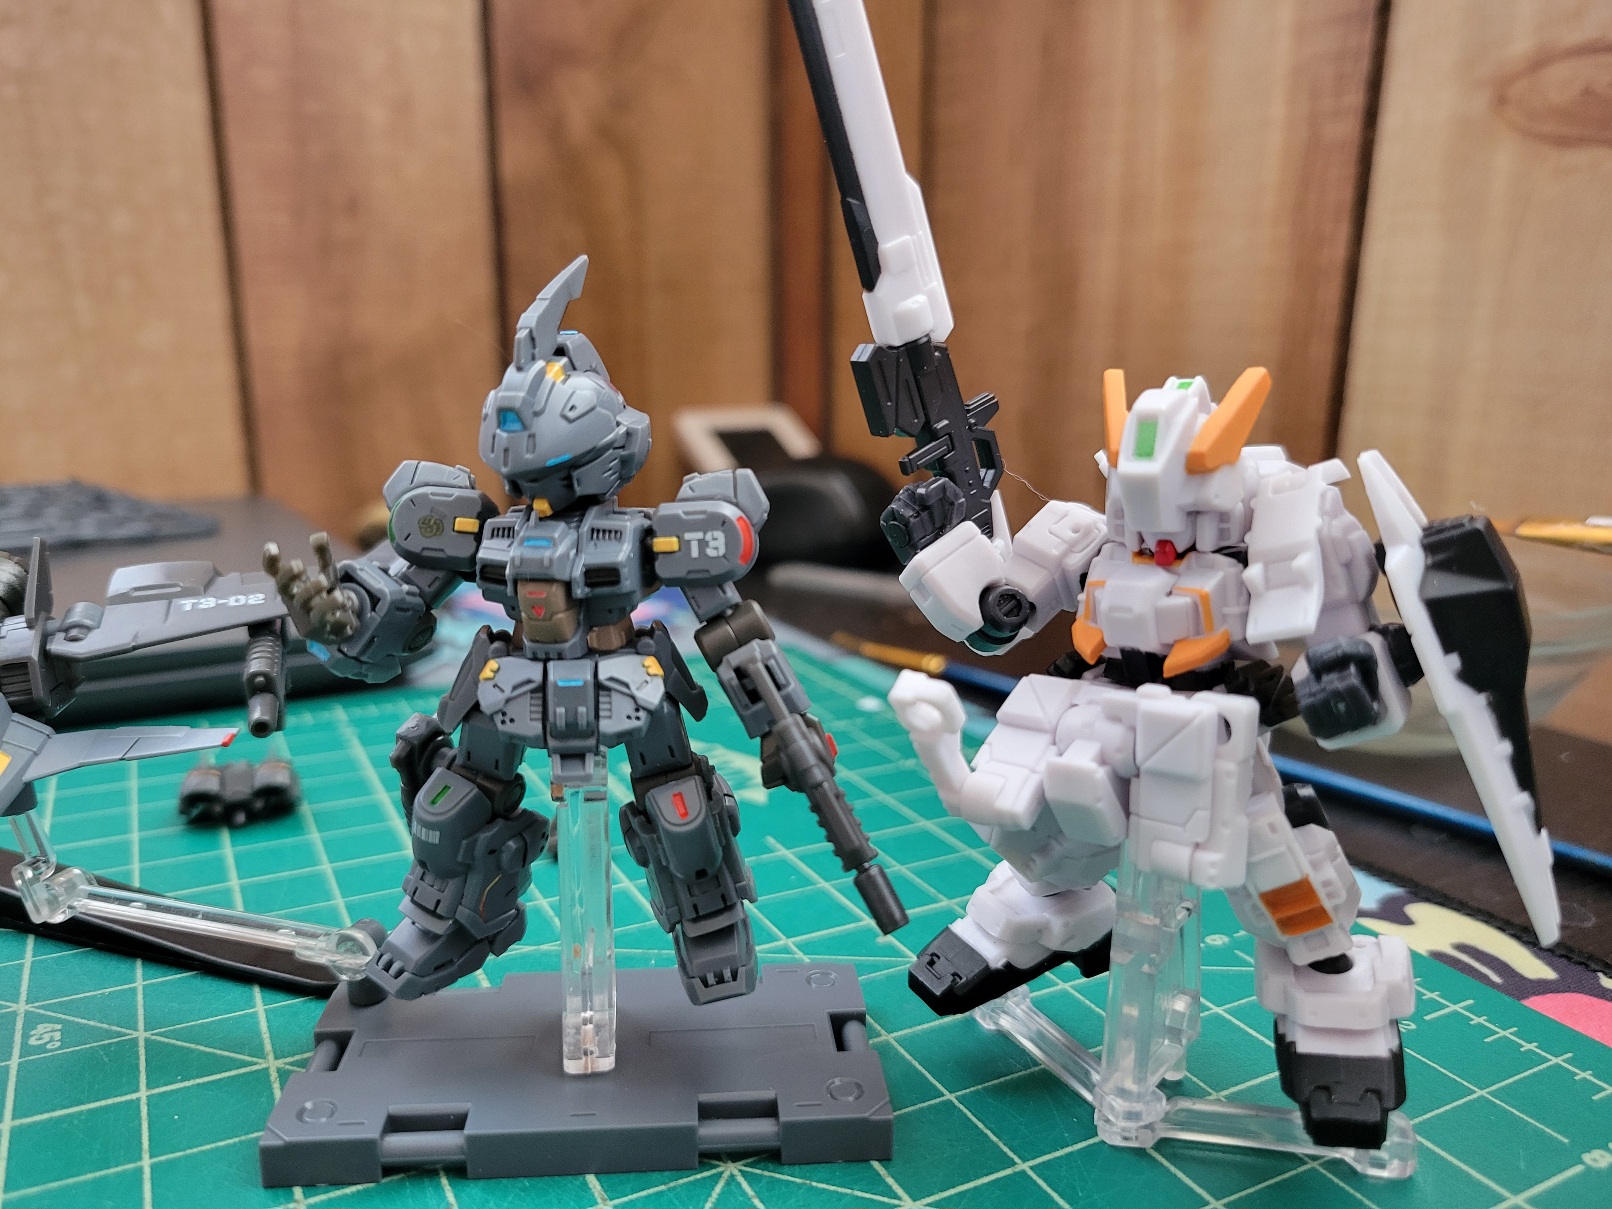
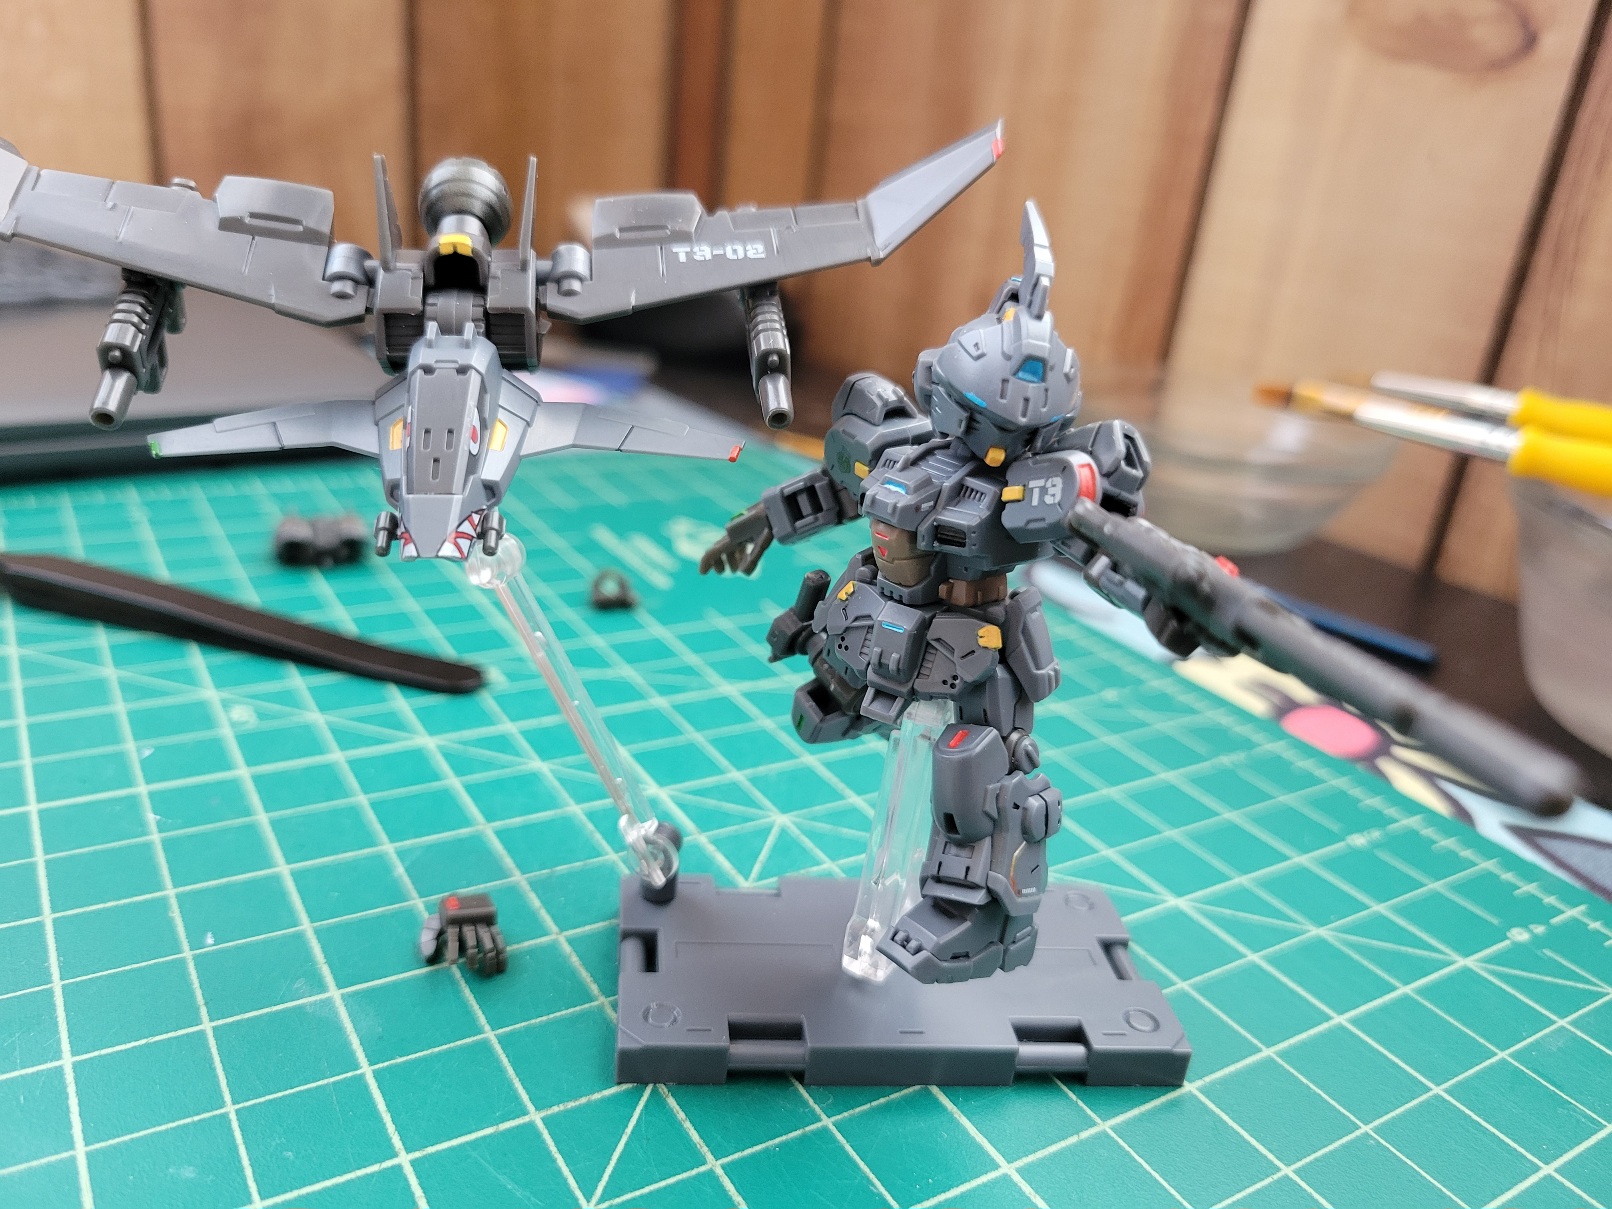
But. Uh. While a gacha guy can fit inside a ~48mm Orb this guy came in a 19x21x8cm box. Technically speaking, since this guy has a vehicle companion/accessories, he would be in two capsules. But uh. even so this guy can't fit in that space.
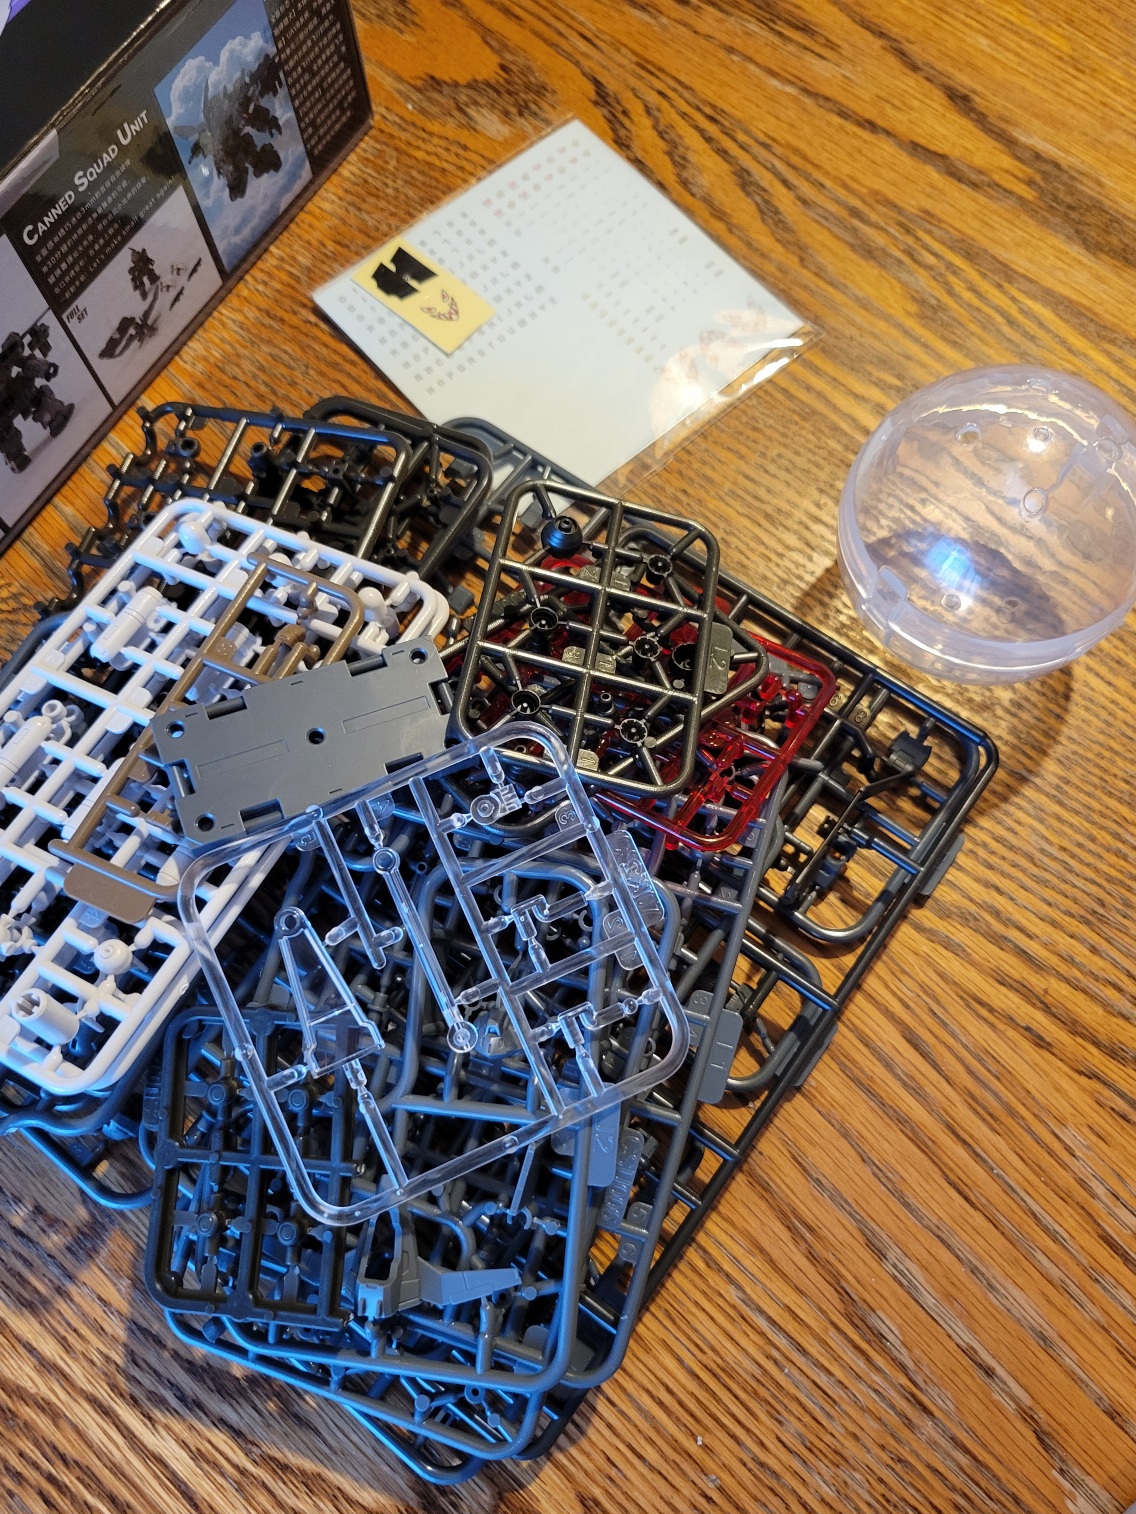
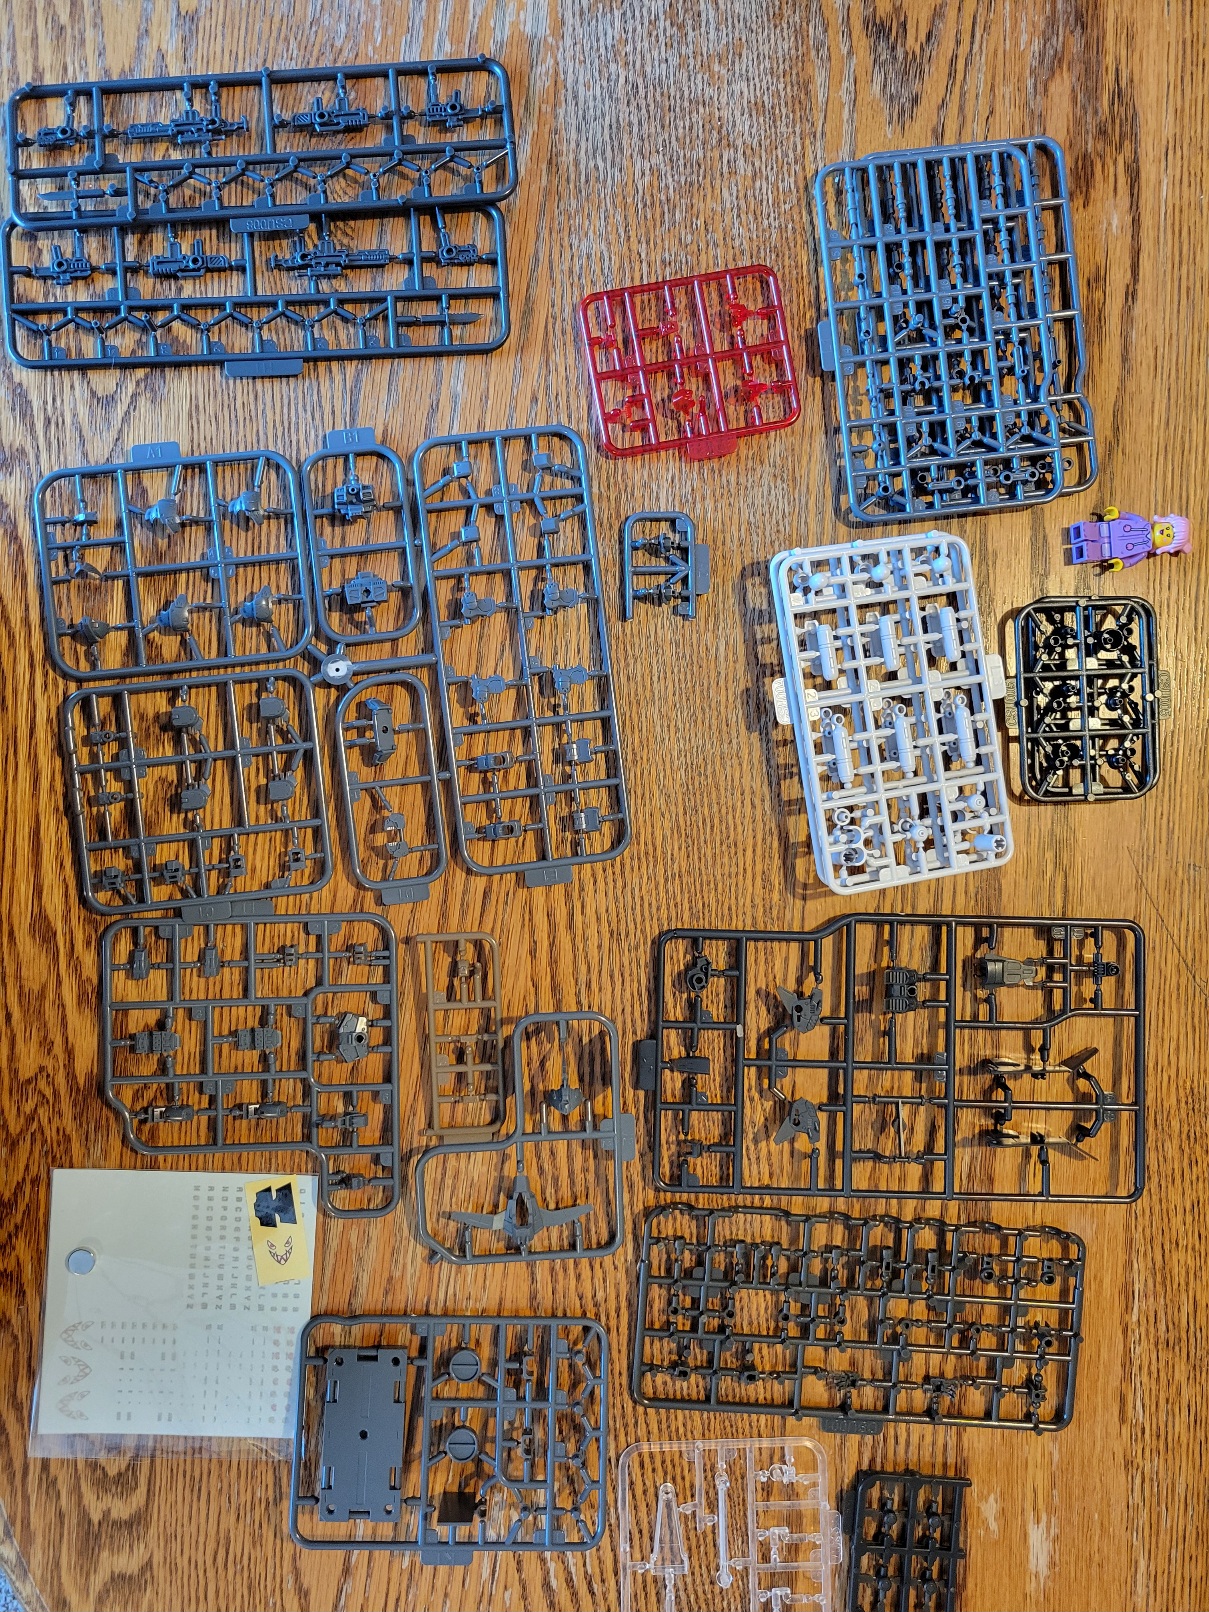
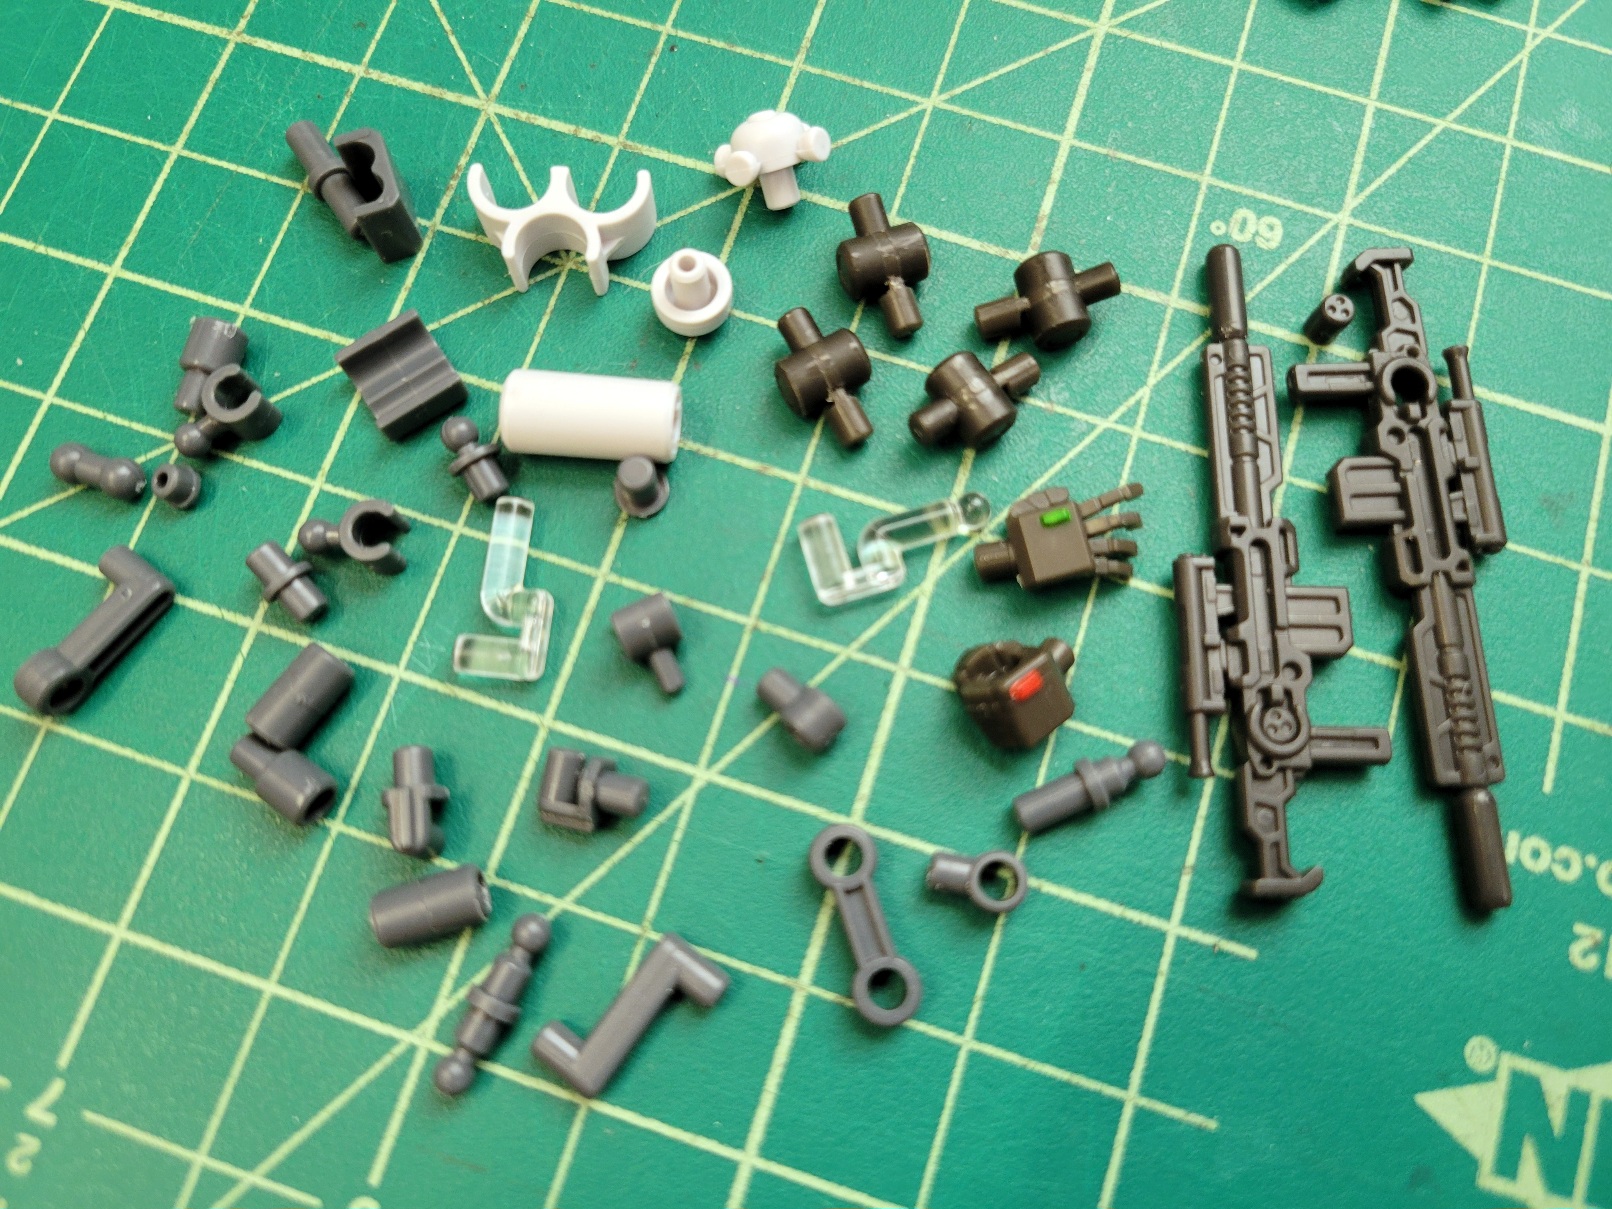
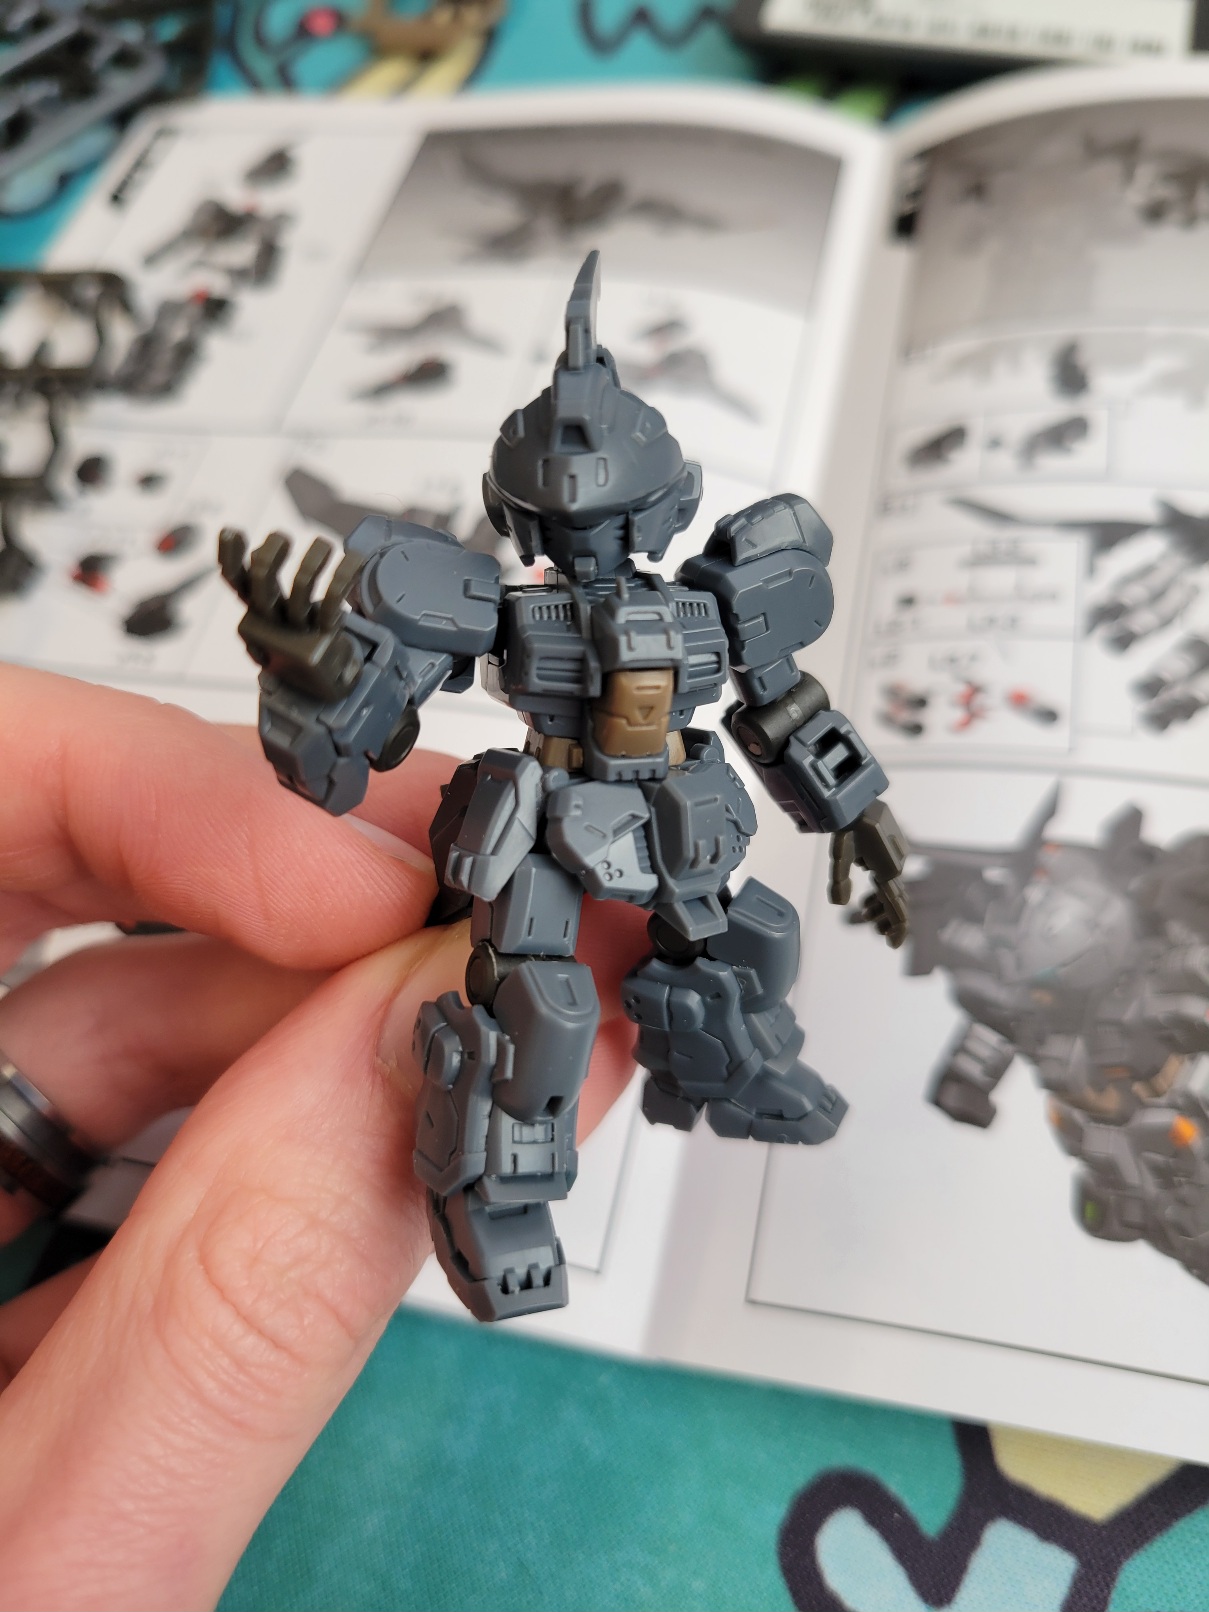
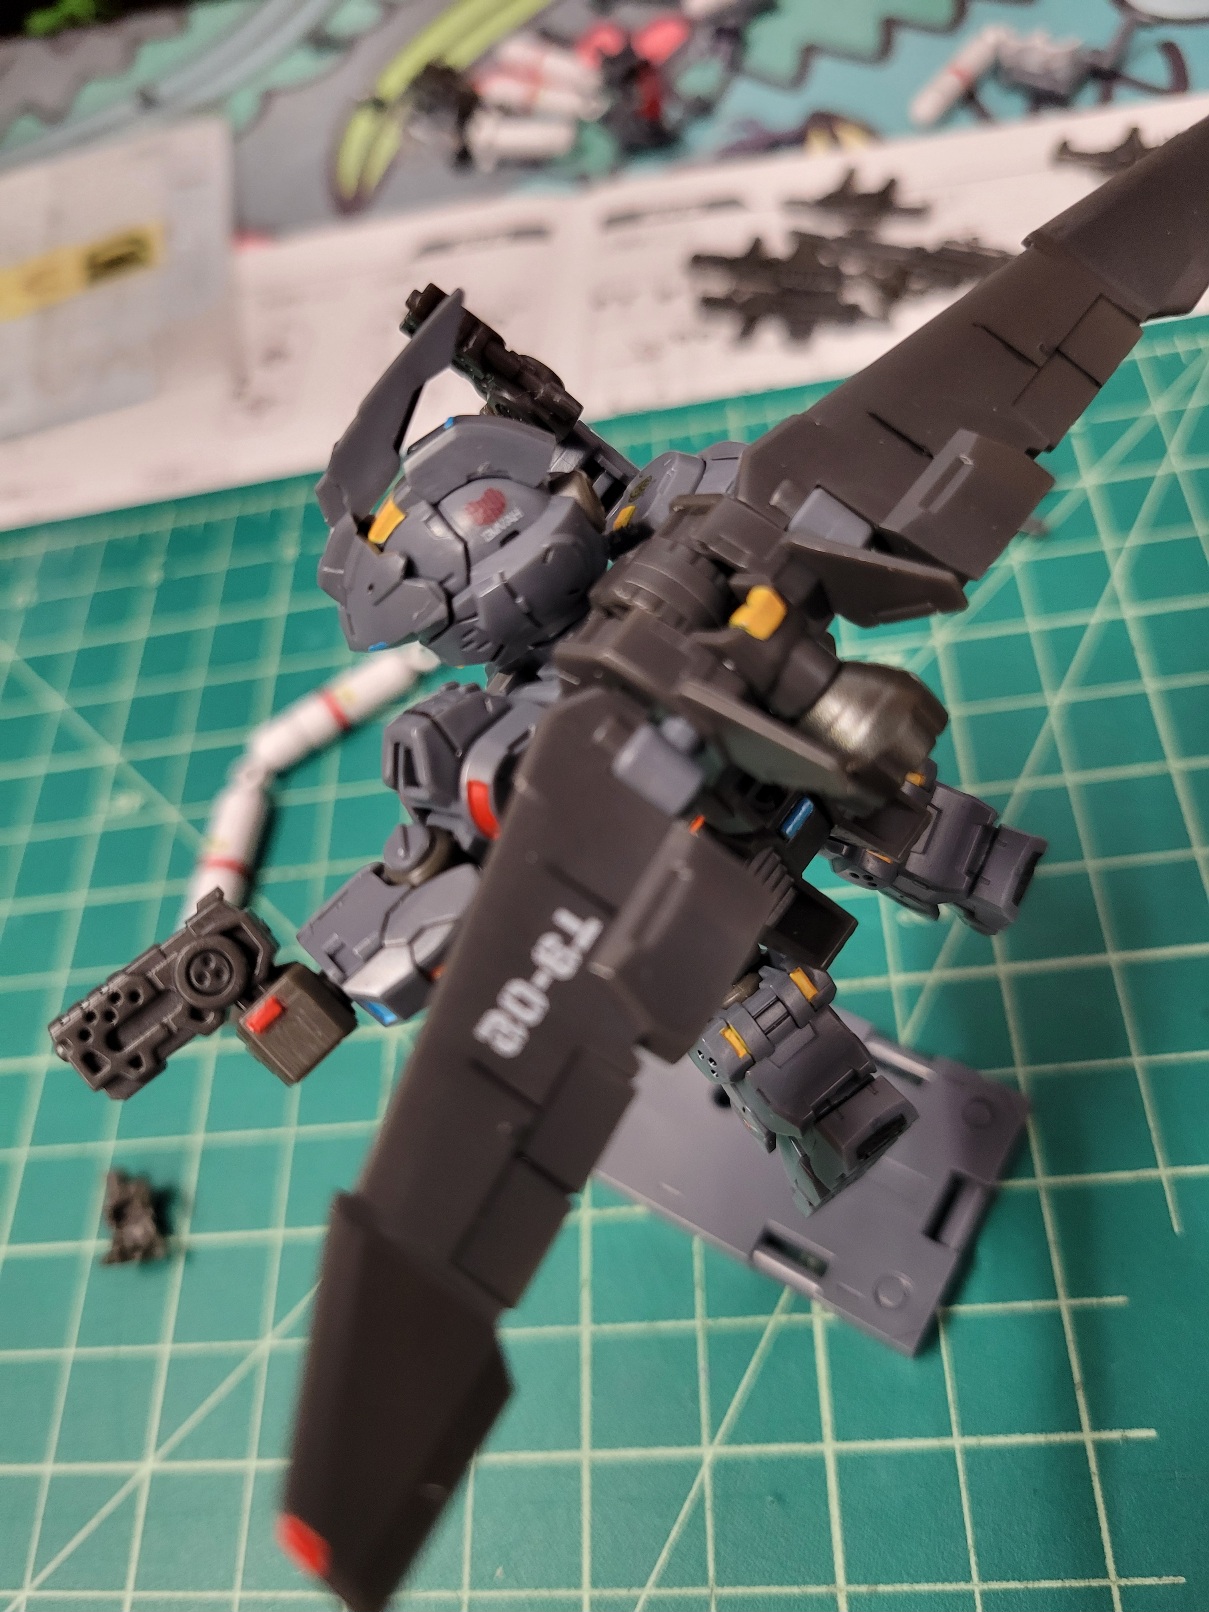
He came with runners and runners of pieces, multiple hands, a slew of weapons, several runners devoted to little extensions and bars and arms for combining things together, a very fleshed out stand system, and even some waterslide decals! Not only is it a significantly more involved build, it's clearly one that was made as a response to/inspired by the MSE guys: It's the same basic 3mm peg system, but with multiple improvements to make playing with the guy even more fun.
little details
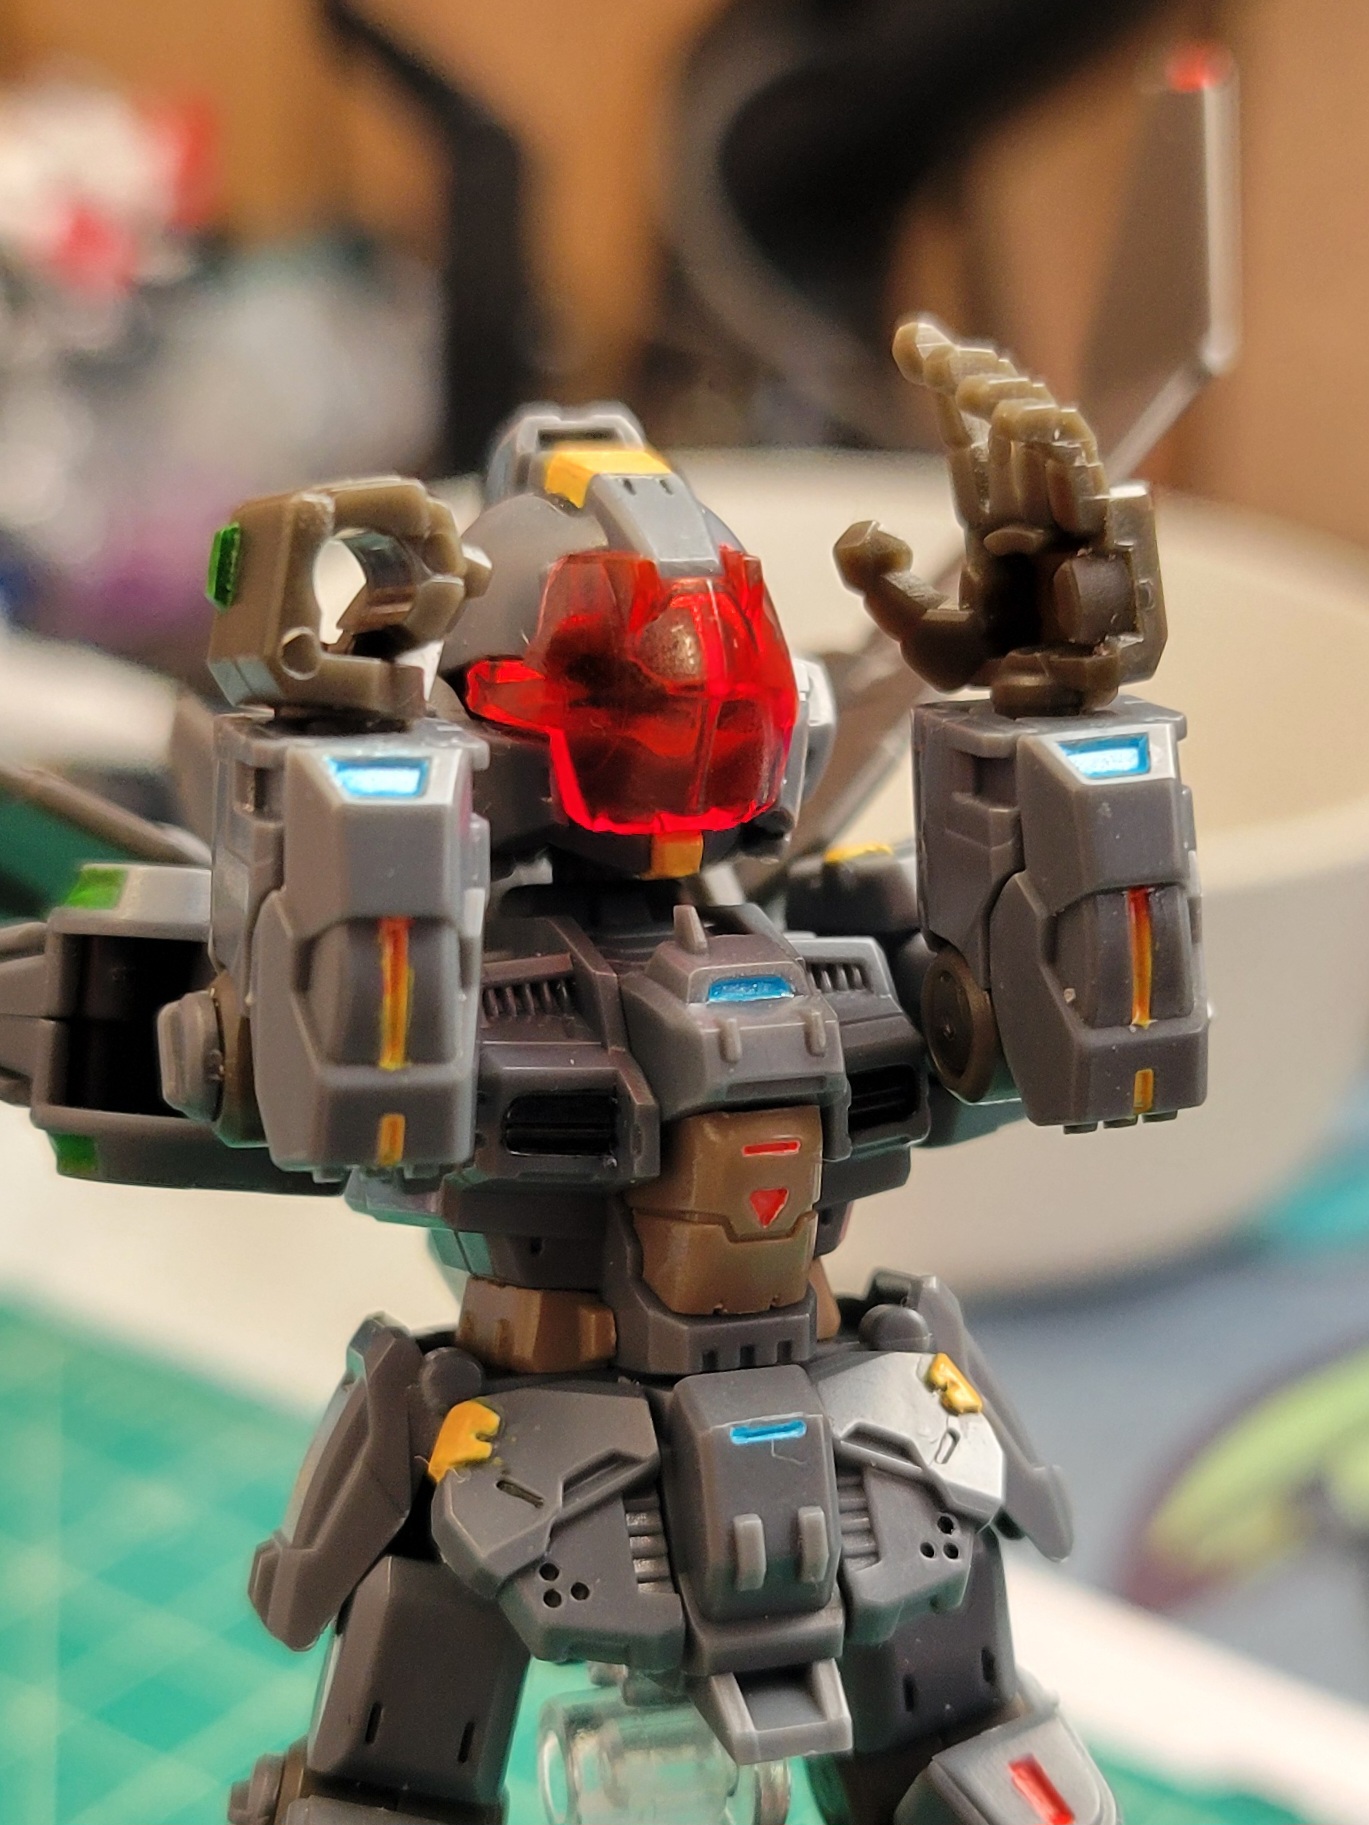
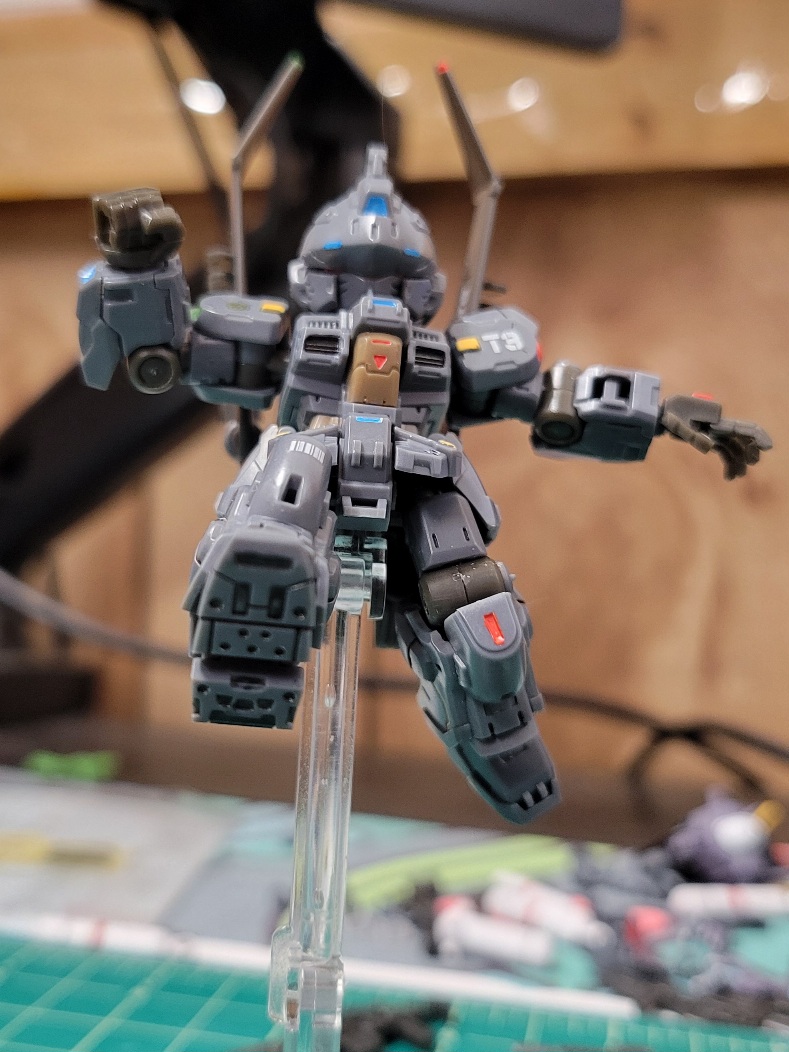
I think the people who designed this put a lot of thought into the design, and it is really neat to see that in so many little details. One of my favorites is how thought out even the injection molding was done. I am by no means an expert in the subject, but I have talked myself down from building or buying my own manual lever powered injection press (twice) by digging deeper and deeper into the intricacies of the process, and mold design is surprisingly complex. These runners are so impressive with how they balance the needs of injection molding with the desires of the one clipping all the pieces out. The vast majority of the pieces are undergated[4], and when they're not, it's the most delicate little needlepoint of a connection in basically every case. There were only like five nubs I went "oh no" about, which... is not at all my experience with bandai kits. You can clip these guys off the runners, trim the little nubs, and sand the remainder down super easily basically everywhere. I had a lot of fun building this guy.
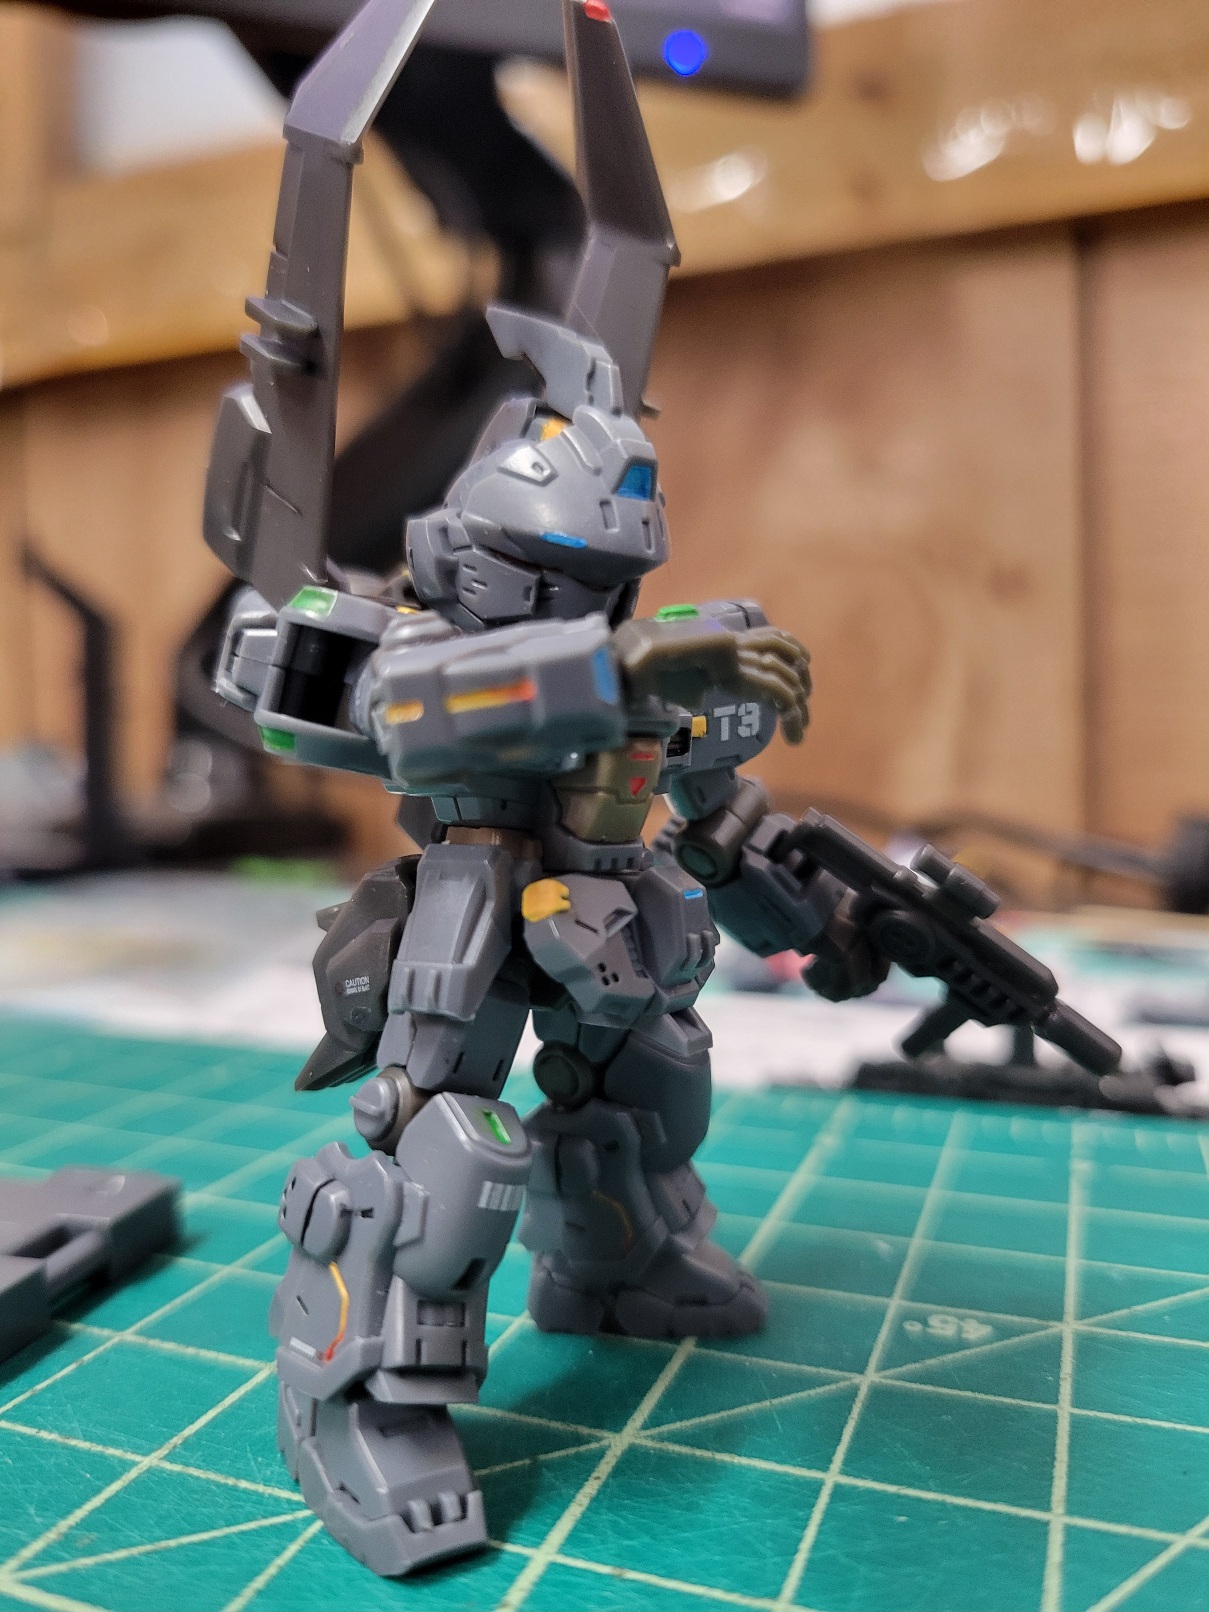
Another little detail is in the elbow/knee joints: not only do they have some super interesting double shot permanently assembled ones, they added a moste critical feature to the multi-piece ones (that are actually the better joint to begin with--the Really Cool Technically doubleshot ones don't have the 3mm holes for pegs for doing Fun Stuff with). You see, a funny quirk with the MSE guys is when you move their knees and elbows, the two halves of the joints kinda work apart from each other. You can squish em back and there's no danger of them really falling apart cuz the peg is so long, but it is kinda weird and a little annoying. So these joints did a thing that solves that entirely:

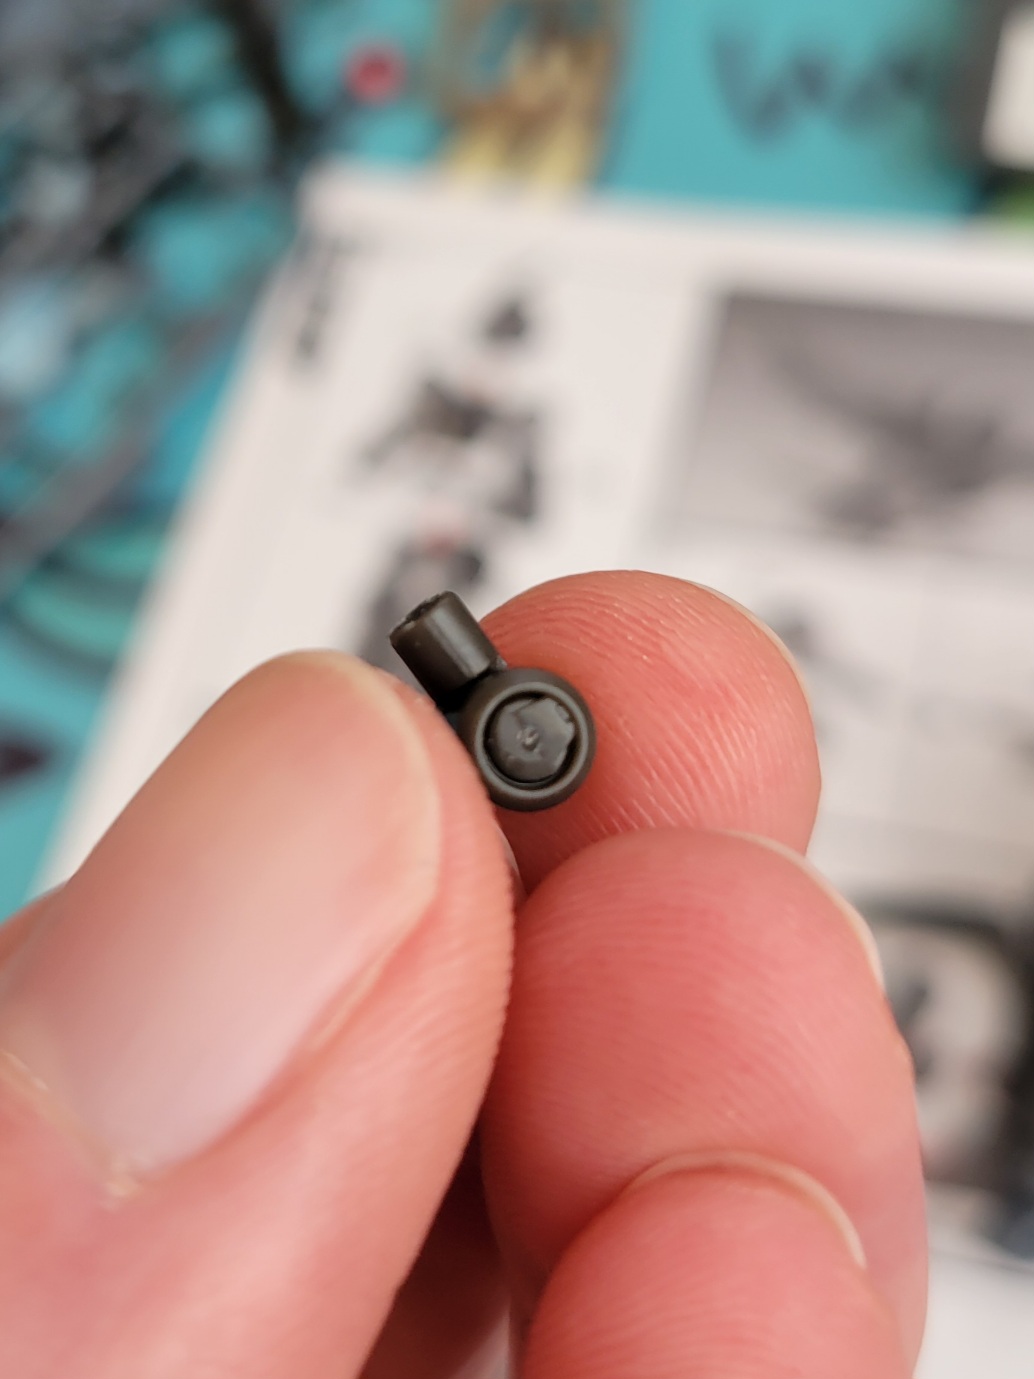
By having a little nub that clips into an inset ring, the only way they're coming apart is if you choose to pull em apart, and that's a thoughtful detail I adore.
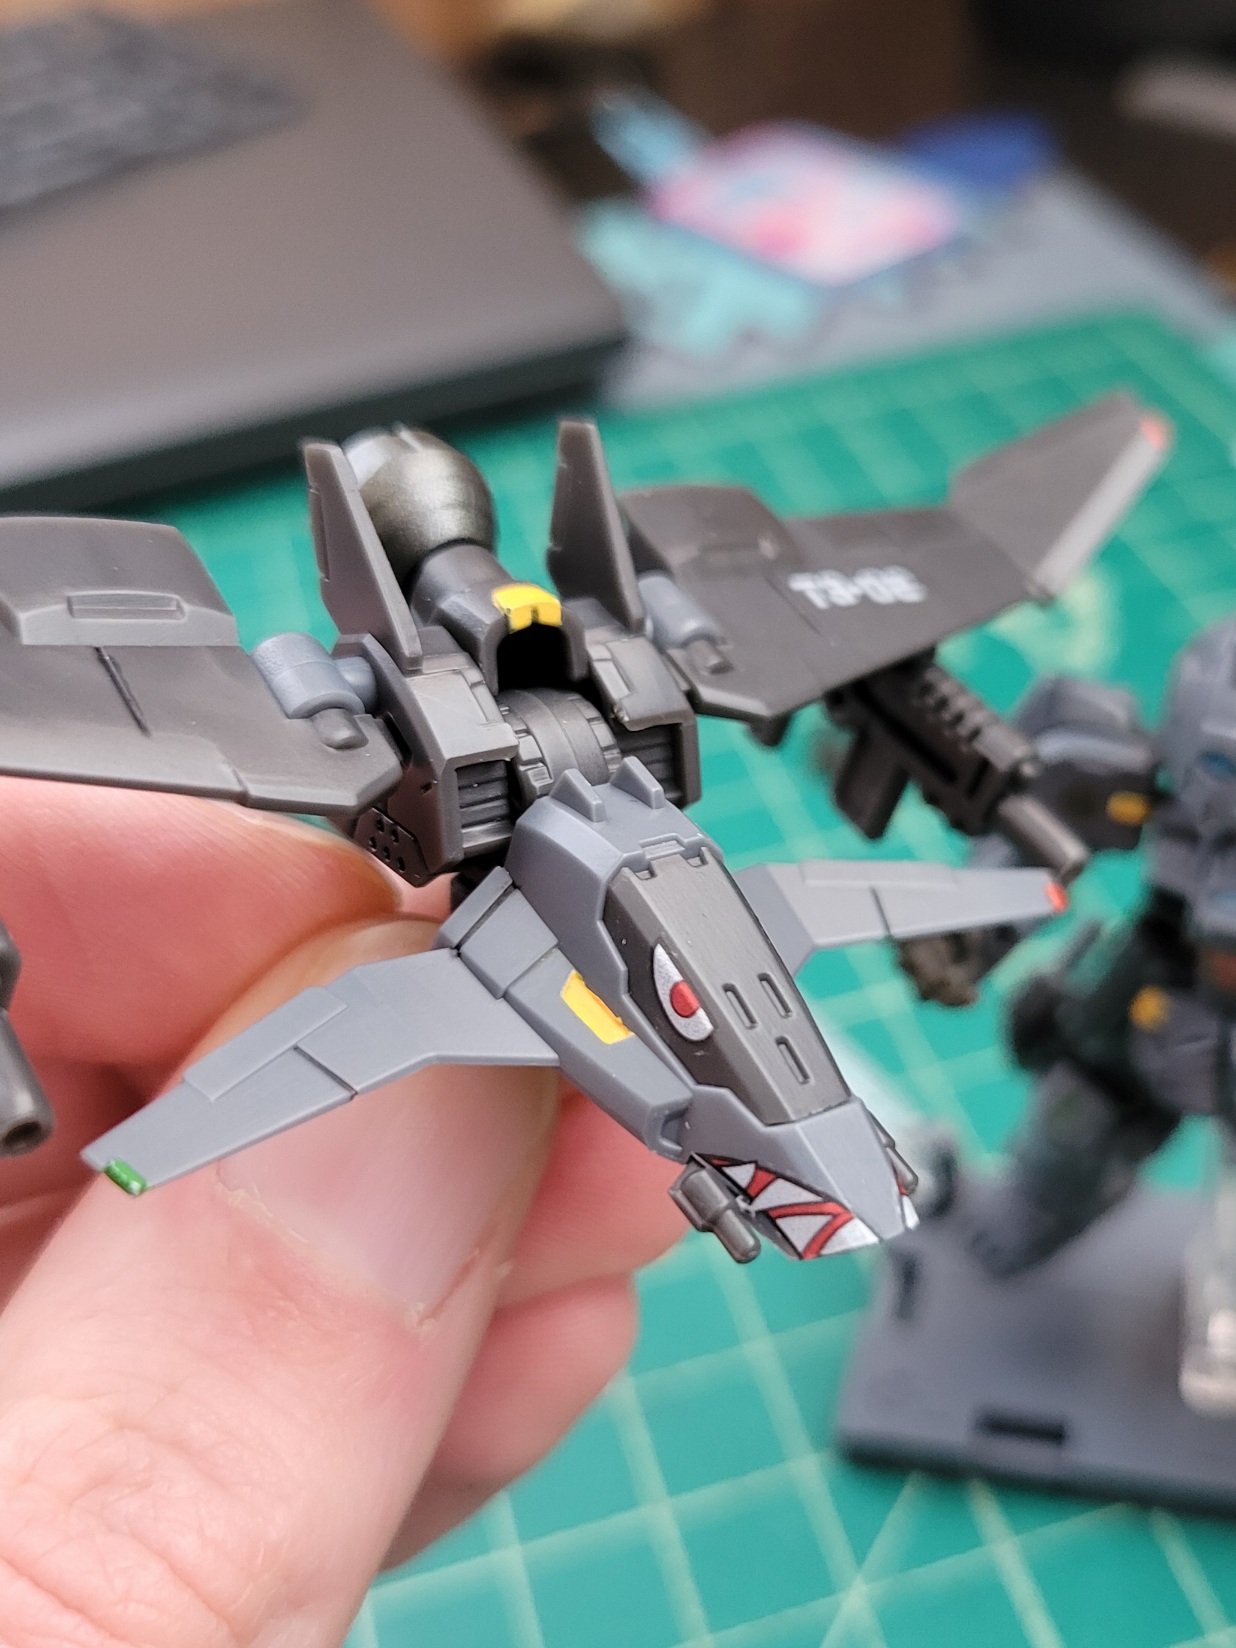
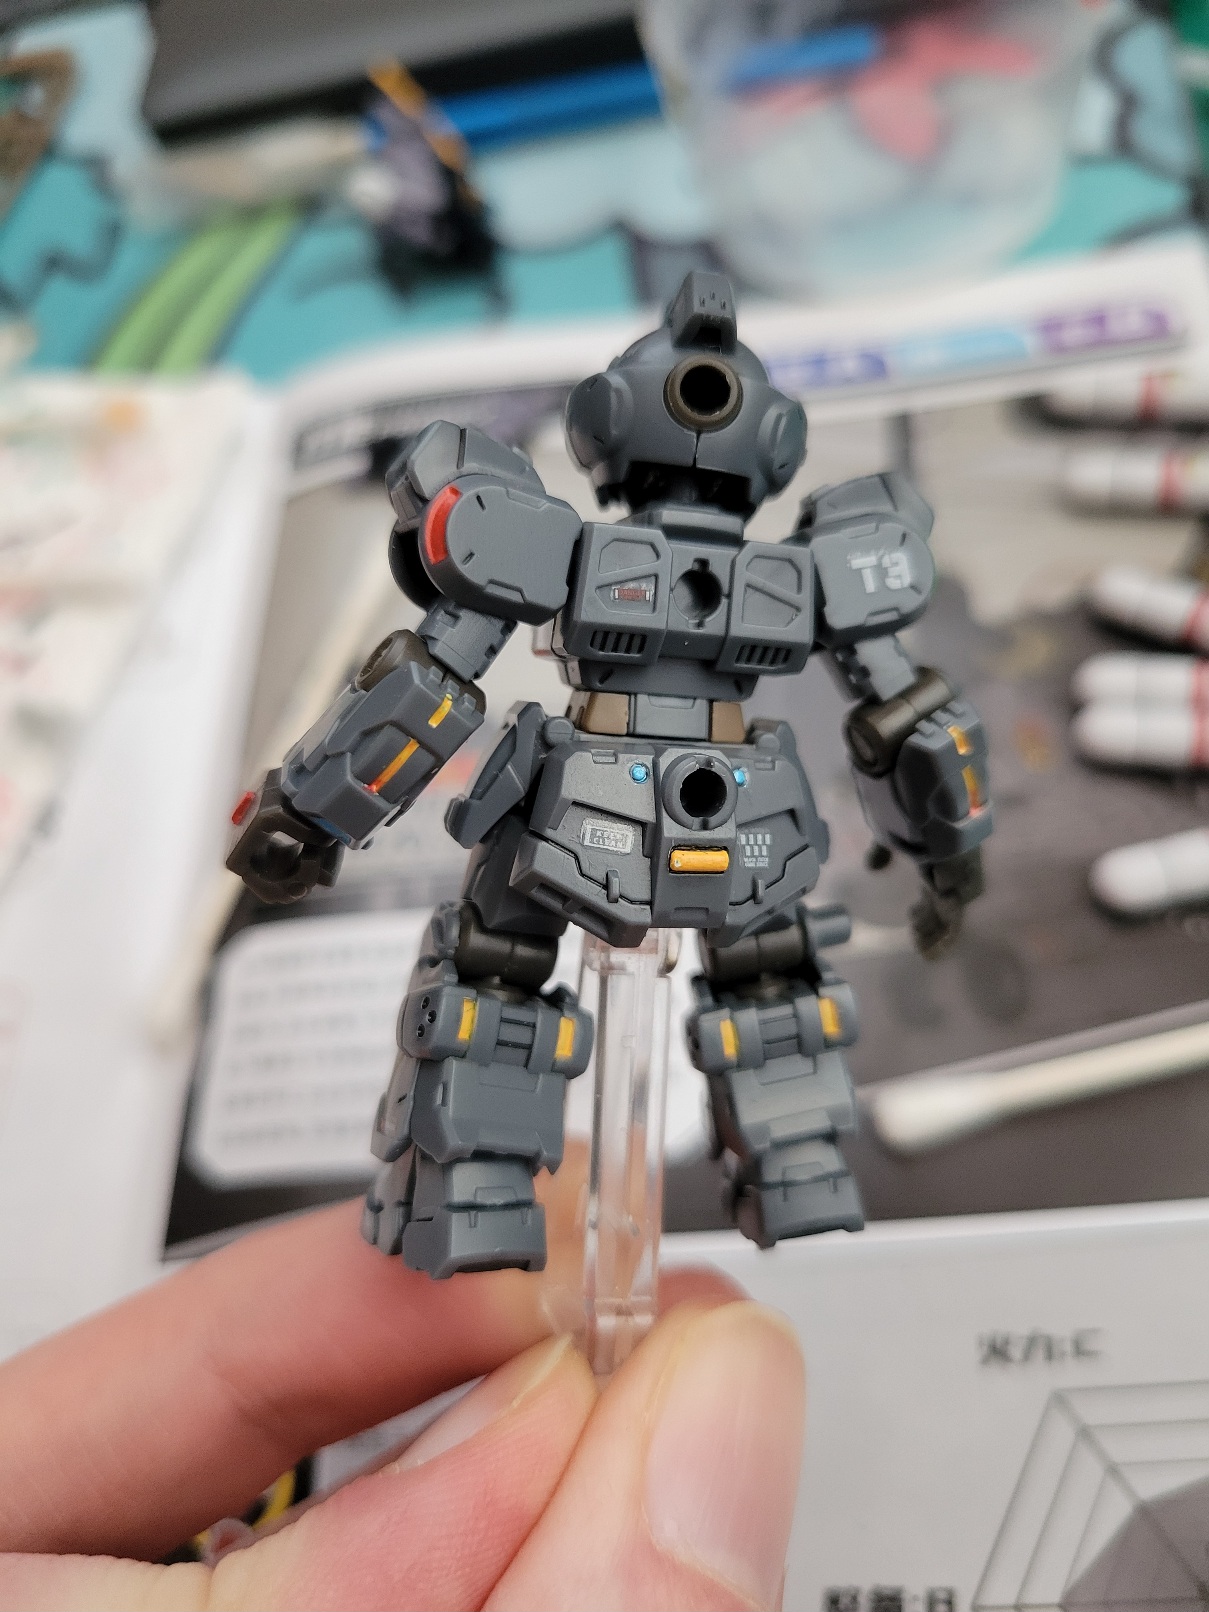
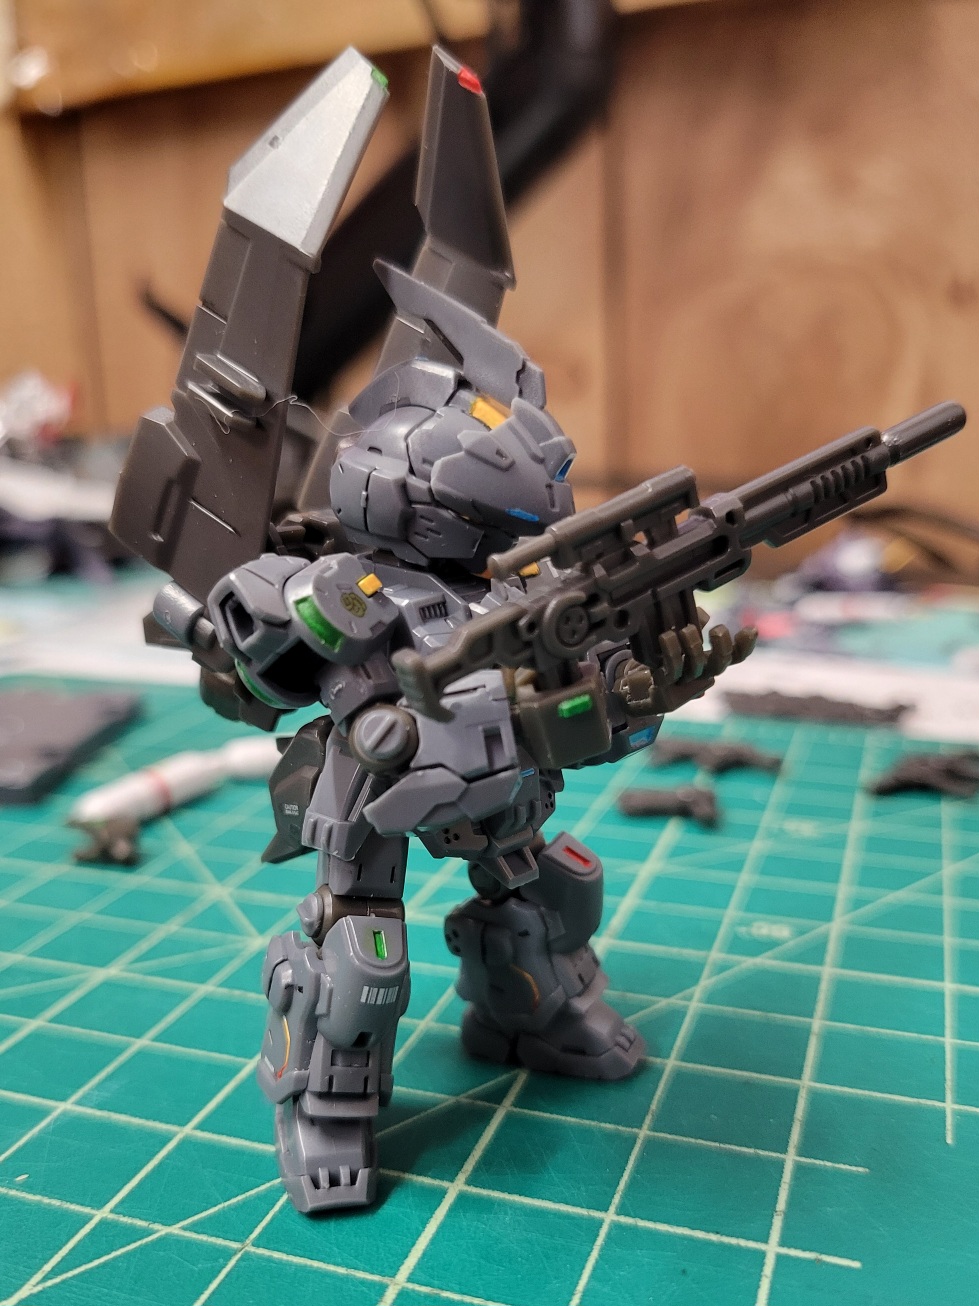
Possibly the silliest feature is the two carved slots on the forarm. These act as reliefs for the ends of the stocks of the guns. This begs a question: were they put here because the guns were modeled first and they didn't want to change them, or were the slots added for a purpose obscure to me and the guns modeled to take advantage of them? Regardless, it ends up a thoughtful touch and is fun/ny.
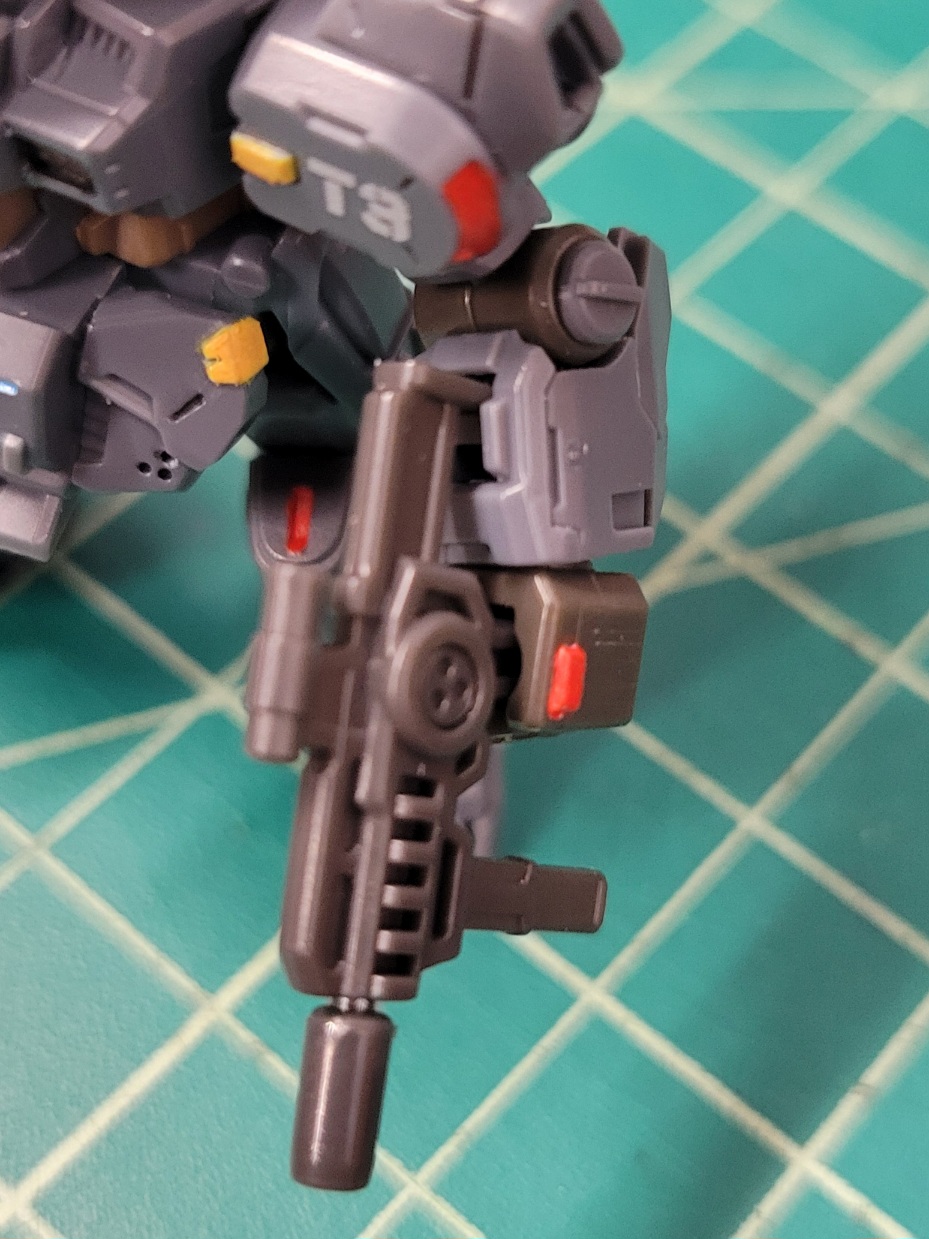
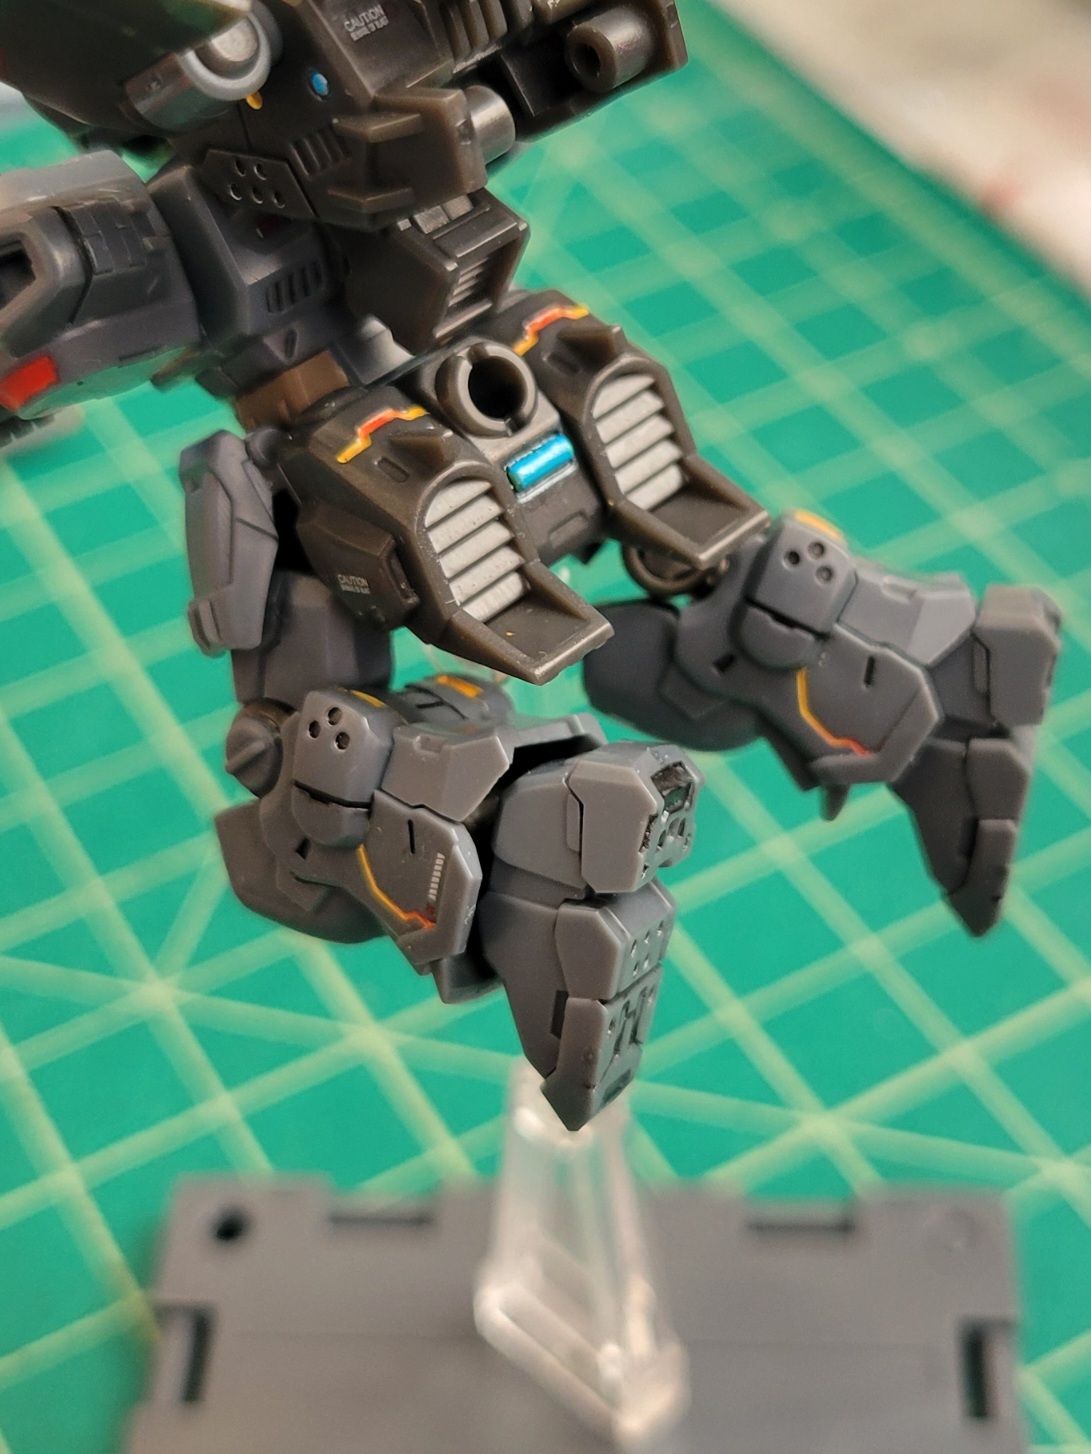
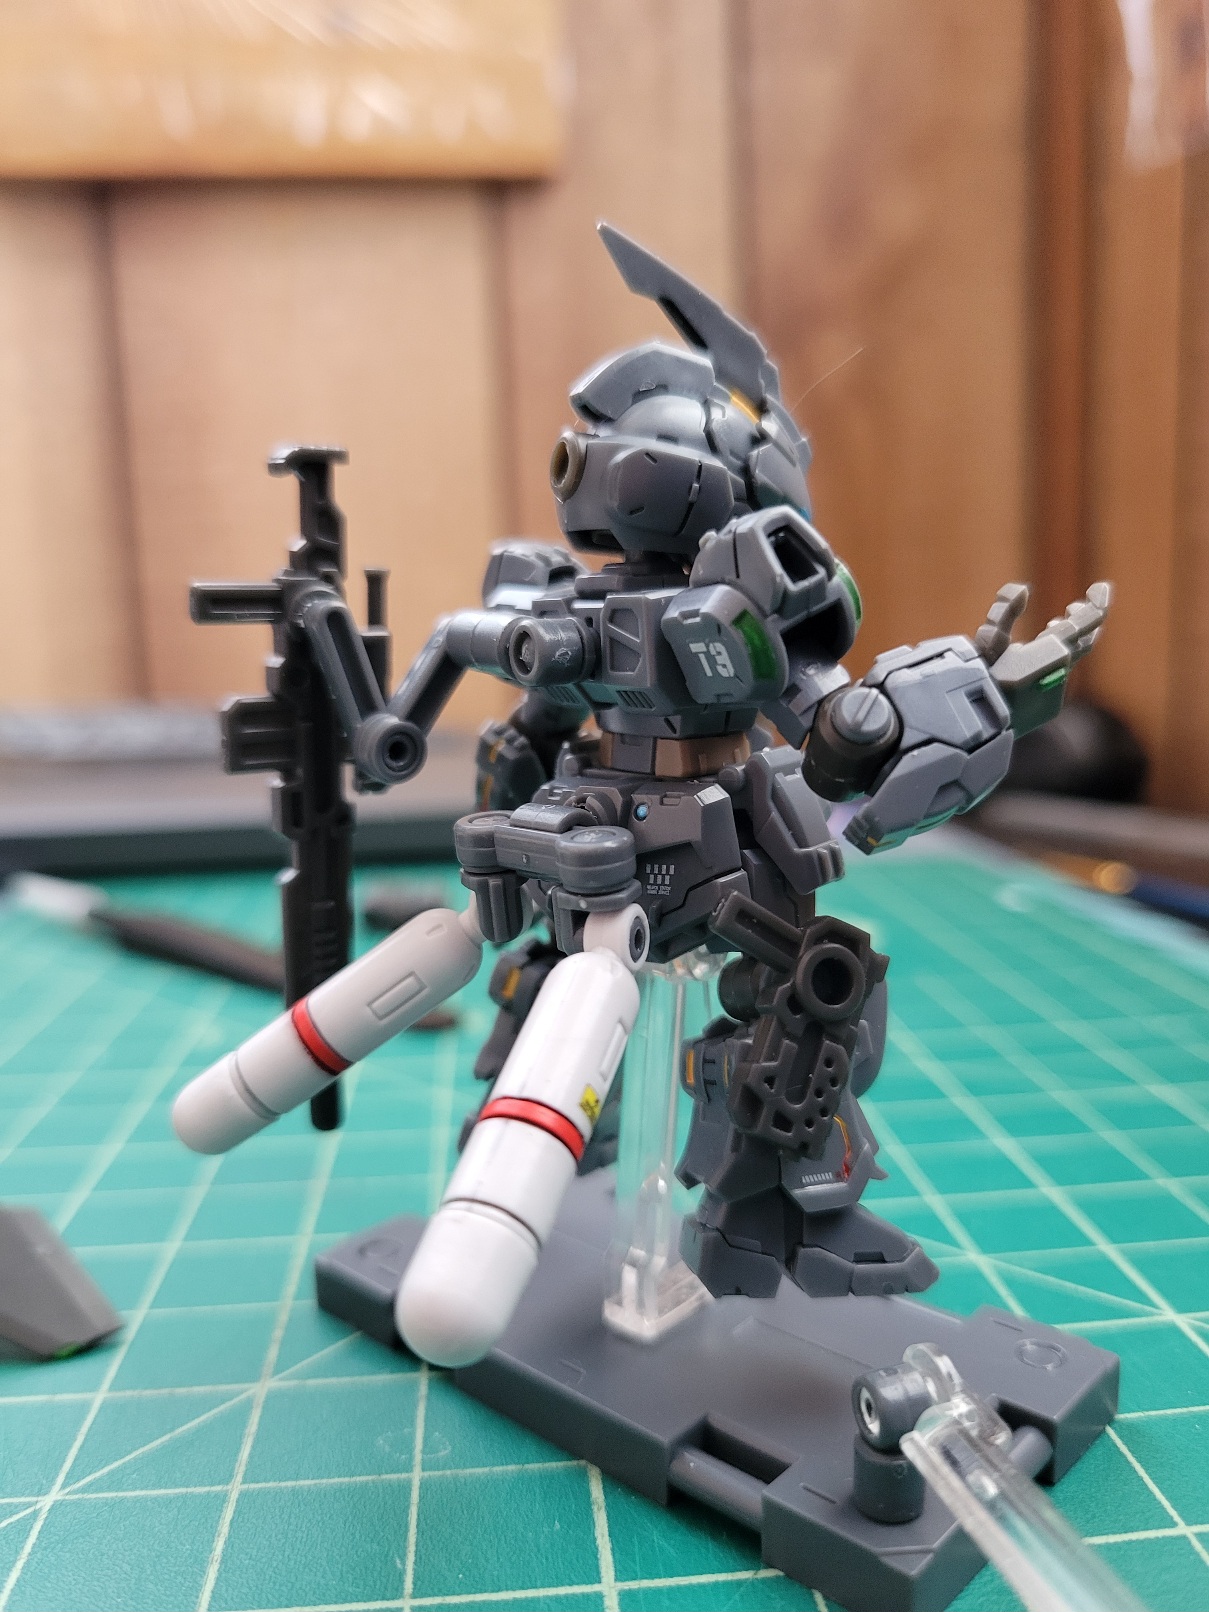
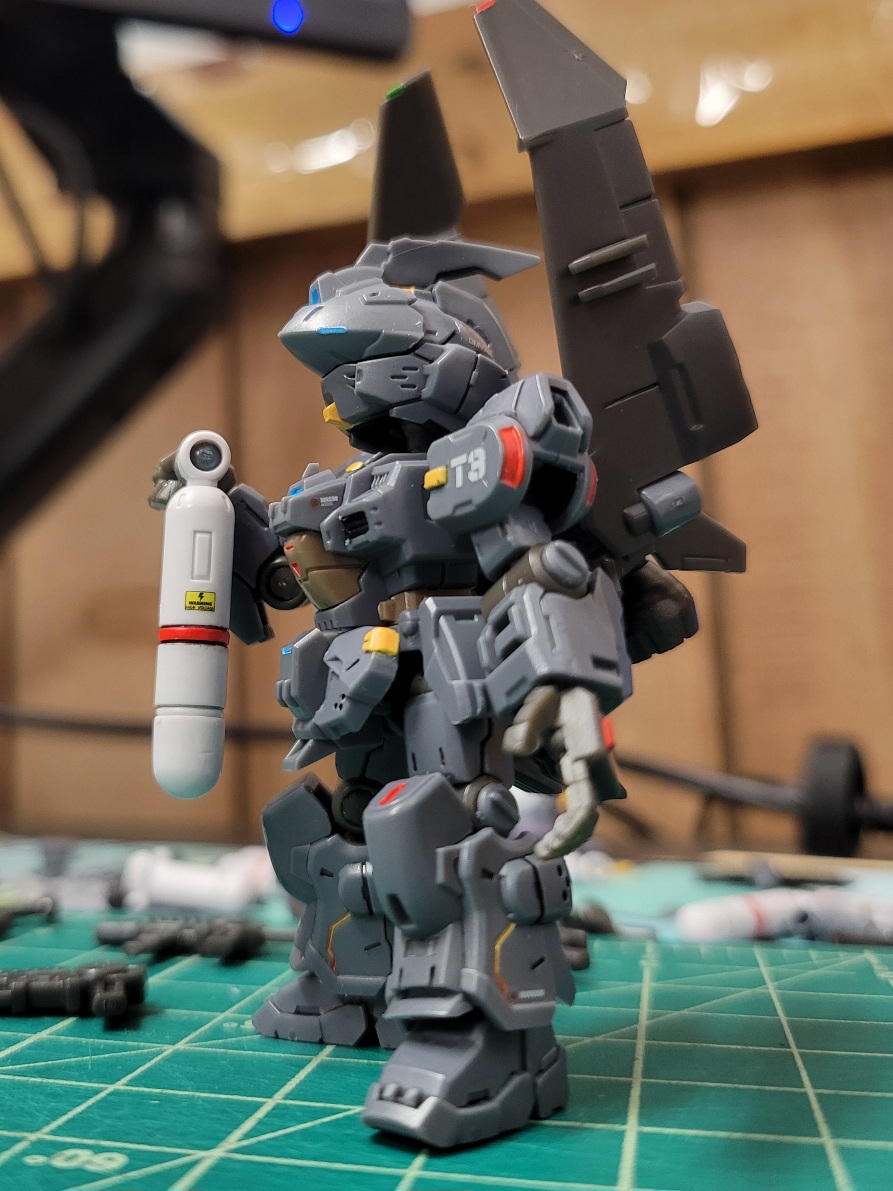
I also really like how they included inserts for all of the hardpoints to cover them up if not in use. They are tiny and I am absolutely going to lose many of them but till then I'll enjoy having the holes minimized. Also: the plethora of pins, tubes, arms, joints, and what-have-yous is super great--this is just some of them. All robots need subarms and doodads and odd attachment points.
Buildnotes
I tried two new things building this guy: waterslides and painting gradients.
-
waterslides Waterslides feels like a modeling staple, so I was glad for a chance to try 'em without having to source them separately for a kit and die of indecision. I try to read about modeling techniques much more broadly than just in gunpla circles, and I came across a good number of things noting how gunpla builders tend to think these are hard compared to other modelers, and I think that's true in my limited experience. Waterslides are so so so so easy and fun. You can slide 'em wherever you want then slurp out the water from underneath with a qtip to stick them in place for clearcoating. You can even dab a smidgen of nail polish remover[5] to make it melt over/into greebles! I didn't really have a placement that called for doing so, but I did a test decal on one of the runner's embossed legends and it was Cool.
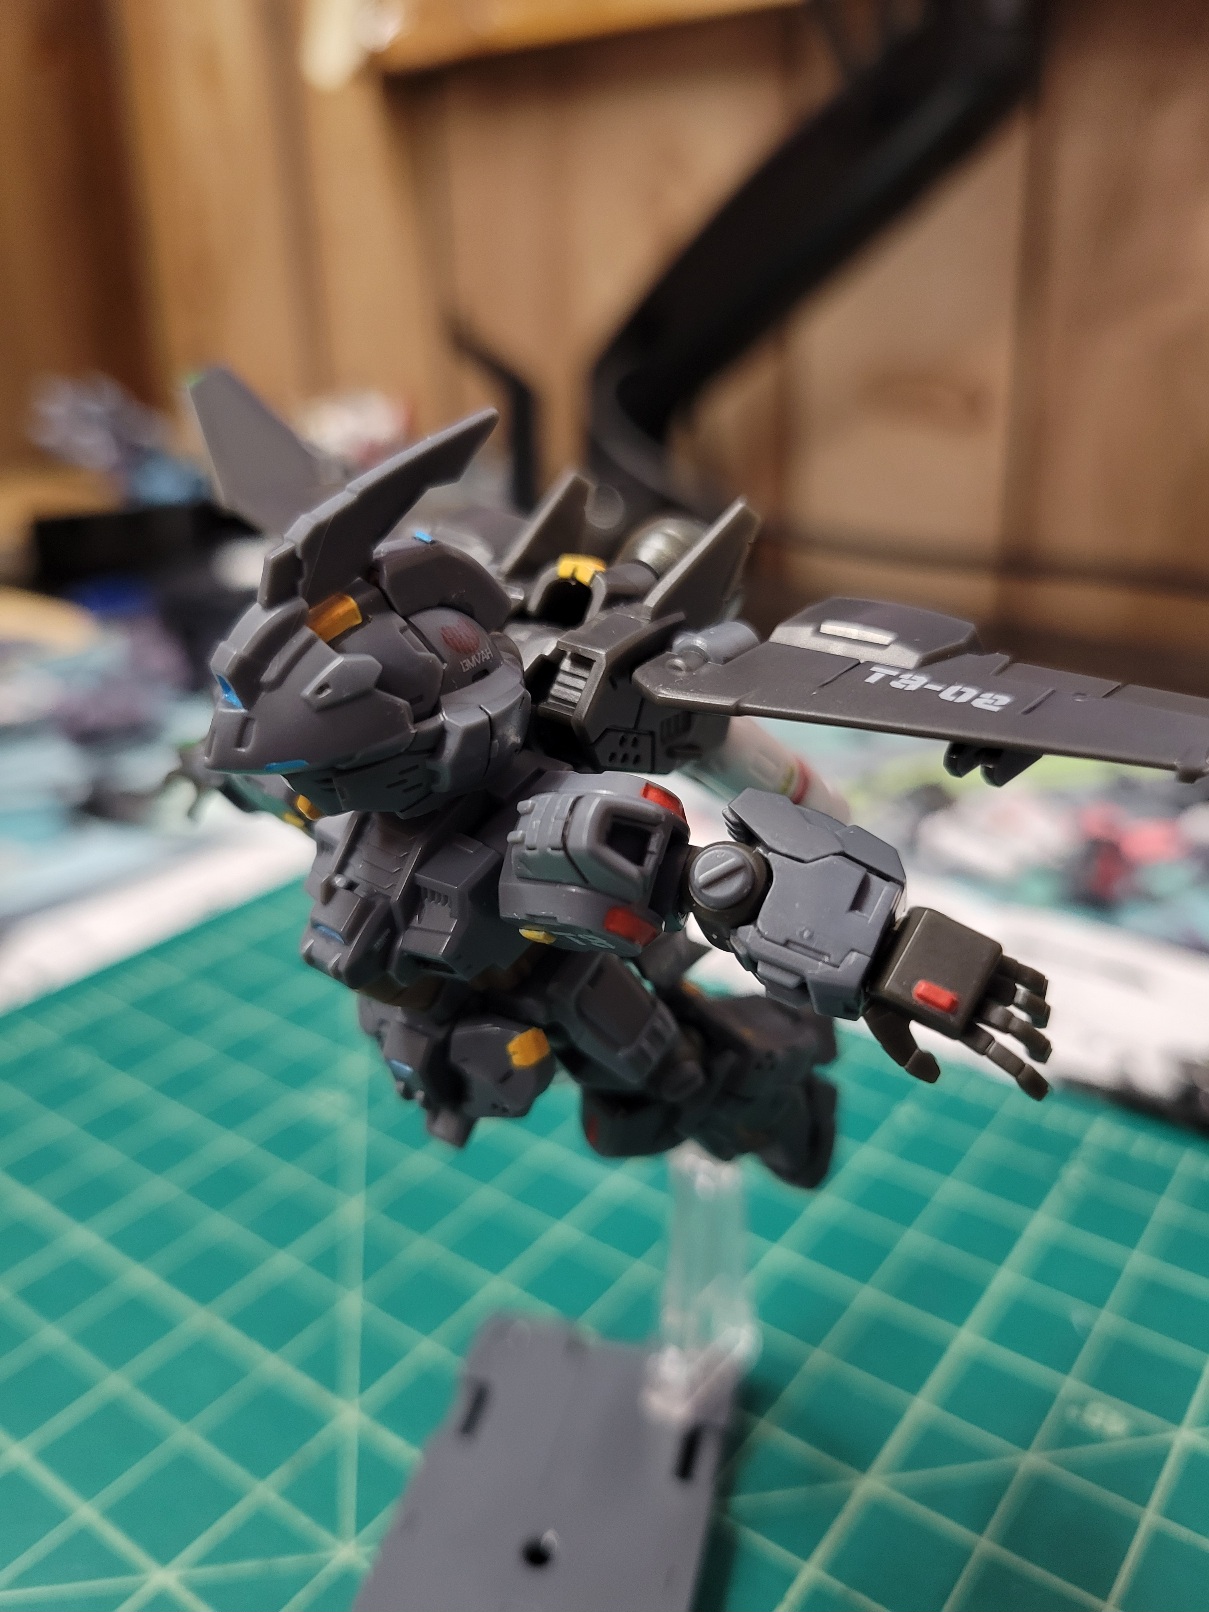
It was just my kind of obsessive detailing to carefully kern and align individual alphanumeric stickers. I stole part of an "L" to make a dash, and I am disappointed I only got three white "T"s cuz I would probably spell "triangle" on the other wing of the plane/backpack unit. Maybe I'll spell something else there? Having no T is a bit limiting; in hindsight I probably should have used a less common letter in designating this guy.
The Best Sticker was a great giant goblin grin face:
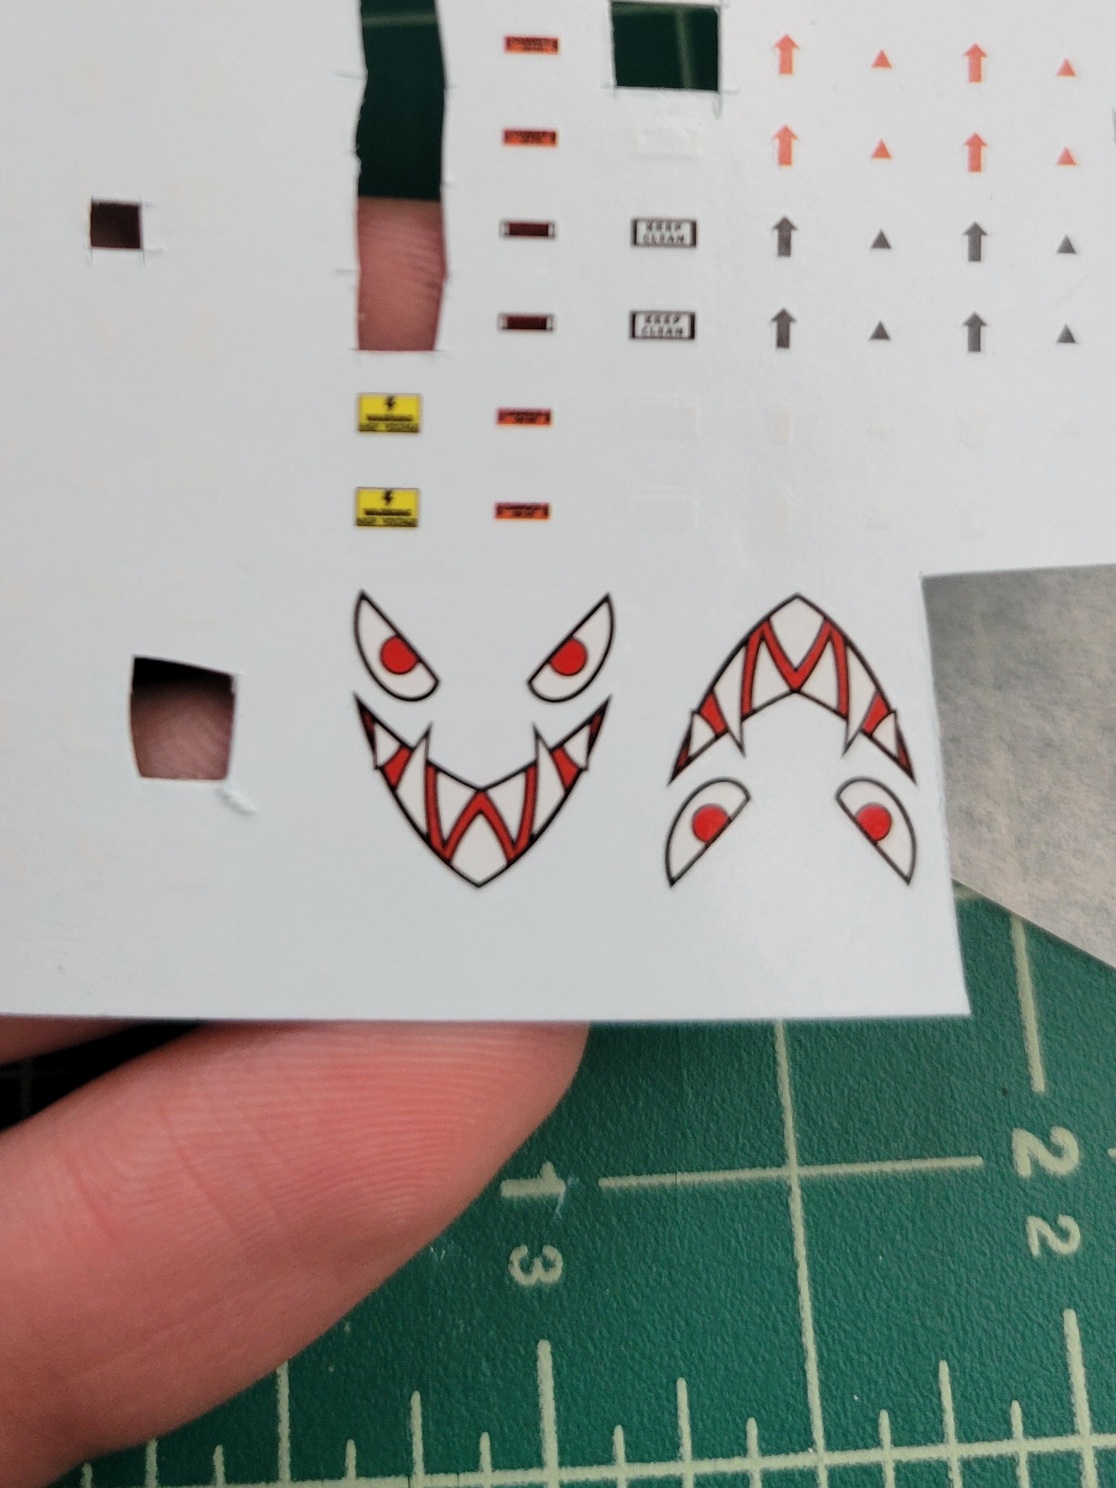
Unfortunately, it was way way to big to really go anywhere whole, which is kinda sad cuz it's so cool. I ended up using one to make a Classic Sharkmouth on the little jetdrone though--slicing the mouth in half worked very well once the pieces were flipped upside down[6]. Carefully carving the nearly invisible bit of sticker that connected the eyes to the mouth was a bit tricky, but it worked out and everything ended up as symmetrical as I can get so I'm ver pleased.
I did all these on Saturday and I keep thinking about applying more waterslides. This guy does not really need any more, less is more etc etc etc but. I wanna waterslide! It's fun!
-
gradients: I always say I am a bad painter and bad with color, so I always have to prove myself wrong. Reading up on mini painting tips a while back led me to some good explanations of methods for blending two colors woth acrylics, so I tried some here in the little pannel line grooves on the legs and arms. It worked pretty good I think!! I will have to try doing it with larger and less constrained surfaces sometime. I don't think my method would port over to watercolor, so I gotta learn how to blend gradients with those sometime too since that's my favorite on paper.
just a bunch of photos
OK, here's a bunch of pics I took playing. This is the first Post I have made that really made me go "hmmm, I should learn how to code gallery features".

not that I knew it was quebley at the time ↩︎
not only ensuring no duplicates but also generally a better deal per figure especially given shipping costs ↩︎
can you imagine a 1:1 gunpla kit, the finished object several stories tall and with a fully fleshed out cockpit ↩︎
this puts the little bit of sprue connecting the part to the rest of the runner on the flat edges of pieces that end up sandwiched together, making it really easy to avoid any scars or discoloration from plastic stress when clipping them out ↩︎
there are bespoke solutions for this "softening" step too but I never buy a tool until I'm convinced I'll use it enough and "something with acetone" works great. ↩︎
I tried doing it right side up, but a) it looked wrong and b) it drastically impacted the possible size of the mouth, forcing a good third of the sticker to hang off the nose ↩︎